 |
 |
 |
|
|
|
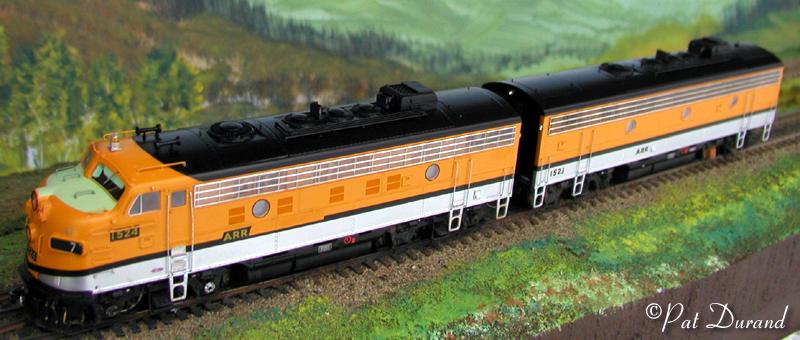
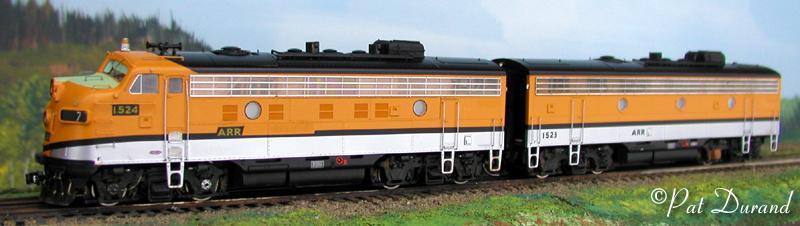
The prototype: (Reference Phillip Faudi's photo for prototype and John Combs' photo for paint scheme). In May of 1970 the Alaska Railroad received an even dozen F units from the DRGW all in the freight paint scheme. Numbers were 1517, 1519-26, 1528, 1530 and 1532 with all odd numbers being B units. Some of these operated for nearly three years with only a number change and small ARR lettering applied. During that time they were gradually equipped with Alaska Railroad appliances such as the double stack winterization hatch and home built snowplows. They retained most of the spotting features of the Rio Grande but slowly lost items such as the extended spark arrests.
The only EMD F9 units on the railroad were among this group.
ARR 1524 F9Am was DRGW 557A built by EMD Bldrs # 5866 in 2/49. Rebuilt to F9Am in 2/54.
ARR 1523 F9Bm was DRGW 5753B built by EMD Bldrs # 16542 in 7/52. Rebuilt to F9Bm in 9/55.
The Models: I got my HO versions the same way the ARR acquired theirs. My Son, Shane, provided me a Christmas gift of an AB set of Athern Genesis F9 locomotives in the Rio Grande freight paint. Removing the Rio Grande and little numbers was an easy job with the emery polishing board. Use a needle in the cracks to just push the lettering and it usually breaks off with out damage to the under paint. Poly S Rio Grande YELLOW is a close match if needed.
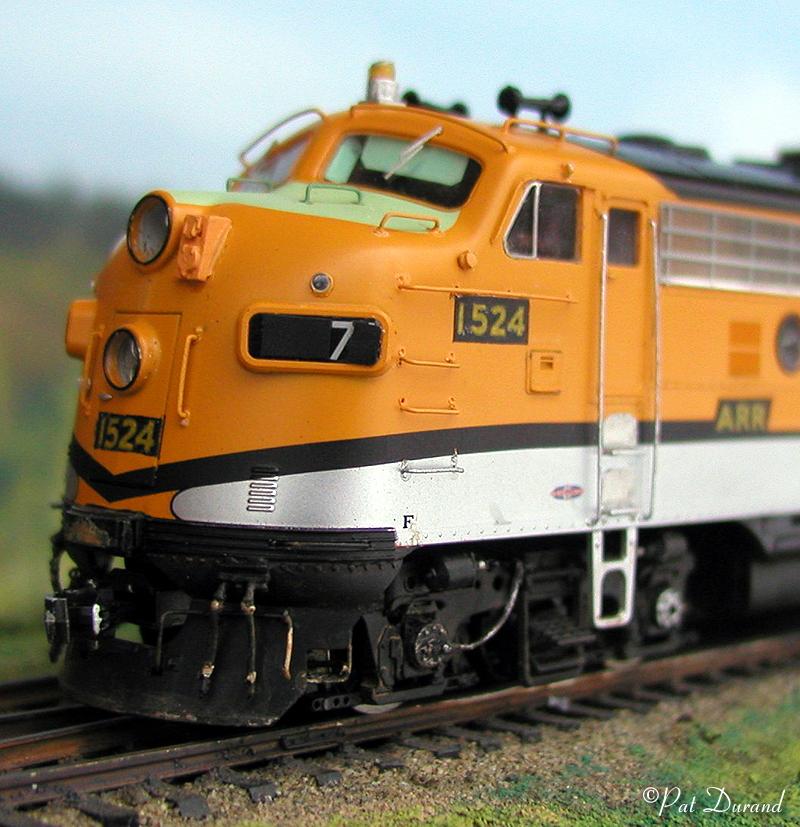
The B unit just gets small black lettering and numbers in the silver field. The A unit requires a double step of masking and painting a black field for the yellow decal lettering. I have ARR Roster shots of seven of these locomotives so that helped. Add the winterization hatch, beacon, coupler cut lever and hoses and the MU connector on the nose. Then get busy with the grab irons all of which are .010 wire bent to fit. On the opposite side of both locomotives there is a ladder rest grab iron applied at the roof line just to the right of the rear/side door, to get access to the engine water fill.
These locomotives had standard Hyat bearing journals, the old sloped Journals, and the big square ones scattered through the fleet. You can get these parts and just cut the original journals off and replace them as indicated by the prototype photos. Don't forget the speed recorder on the left front journal. I find it best to sweep the cable from the recorder up toward the frame and then bend the end of it back at 90+ degrees and glue the end to the top of the side frame. When you weather the trucks just highlight the lower end of the cable and it will just disappear up into the frame visually. Other tricks, paint the brake piston rods stainless, brake shoes rusty, do an occasional journal in aluminum, journal wear pads may be modern "green plastic "where they have been reconditioned. Don't forget grease and then do a thin wash on top surfaces with Tarnished Black where the sunlight hits the trucks.
Sun shades were cut from colored paper with a folded hinge to make gluing to the cab roof with white glue easy. After cutting the dash panel from the cab interior I then applied it in the correct position closer to the cab windows. I used small patches of Walther's Goo on the inside of the nose casting and on the back side of the dash, let them almost cure and then inserted the dash. To make wiring easier for the beacon and dual headlights, I also cut a notch out of the center of the rear cab wall so wire does not get trapped passing through the hole at the bottom.
DCC has been installed in both powered units, and eventually a Tsunami Sound System will go into the B unit.The strobe light is one function on DCC, each headlight and dimming are functions of the Decoder used.
This was just a great fun project, inspired by the gift of two unique locomotives
for which I had prototype photos. All the bits and pieces just came together
at the same time. Try it you'll like it! -- Pat Durand