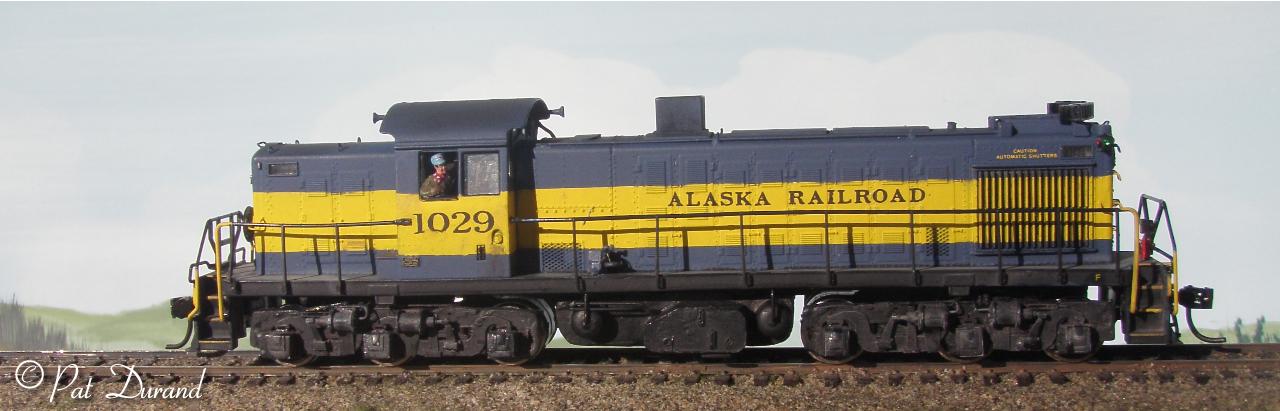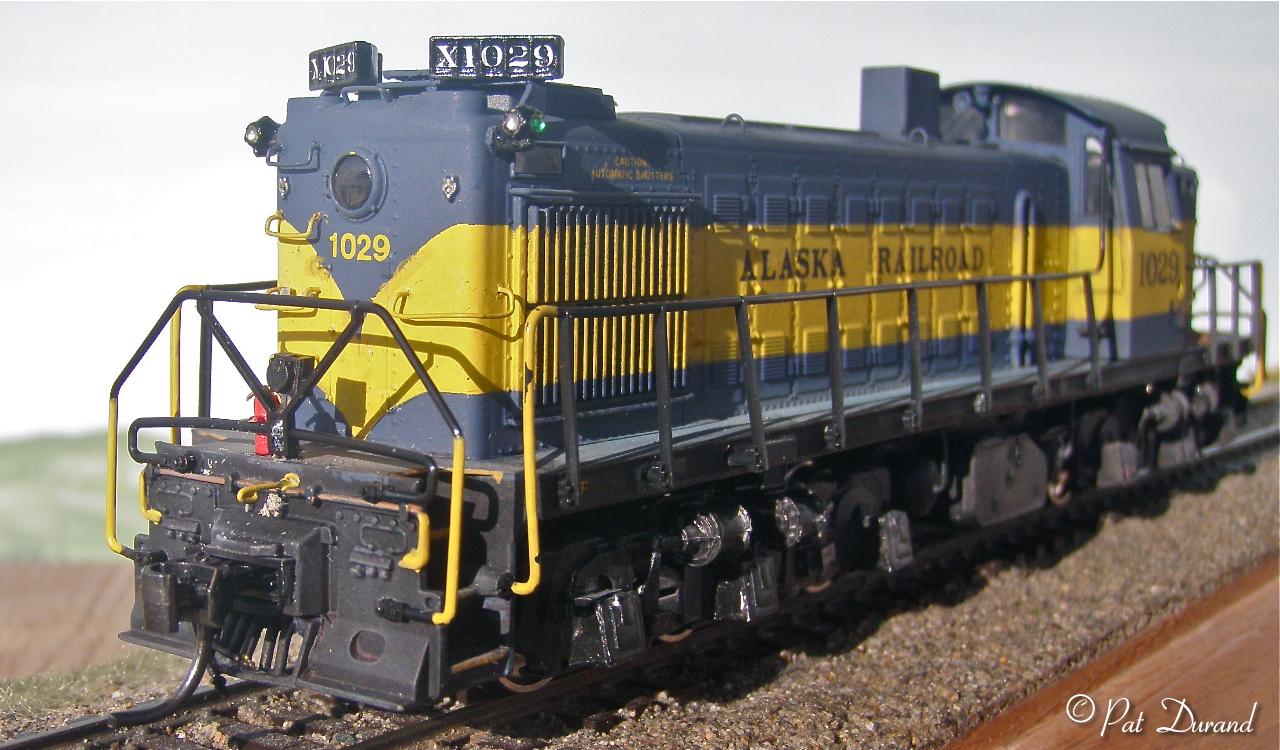
Alaska Railroad RSD1 ALCO #1029
by Pat Durand.
The recent move of RSD1 USA 8011 former ARR 1034 from
Strasbourg to Fort Eustis, Virginia attracted the attention of Michael Patrick
. He took some photos that
came to my attention and a few emails later he sent me detail shots of the
trucks, frame and the car body. Motivation finally, to make an attempt at building
an Alaska Railroad RSD-1. Specifically Alaska Railroad #1029 as she appeared
in Whittier in 1947 in Blue and Yellow paint. The ice breaker frame was used
in the tunnels for a short time until they replaced it with a similar frame
in the middle of a gondola that was pushed through in front of the train. Along
with all the roster shots at http://alaskarails.org/pix/ARR-picts-old-r.html,
I was able to proceed. This is not a rivet counters delight but the results
meet my expectation of a recognizable model and a great running representative
of the class on the Alaska Railroad.
This all worked out well with the left over RS1 body and hand rails from another project: http://alaskarails.org/creations/PD-1070/index.html
I started with the weights, deck and modified chassis from an Atlas Kato Classic RSD4/5. The chassis and trucks have the proper three axle wheel base and bolster spacing . The truck side frames will become credible after about 40 pieces of styrene and four hours are devoted to each side frame. The weights and metal components of the chassis need to be modified by removing those portions that interfere with mounting the RS-1 body.
All the grab irons were carved off and replaced after painting with wire. The RS-1 body is now glued to the RSD4/5 deck to become one piece. The cab is still removable. Number Boards and class lights were added by the Alaska Railroad to all their ALCO units. The RS1 body is about 1 scale foot too short to cover the RSD deck so it was separated just inside the front cab wall and a 1 foot extension added to the back of the front half. For some reason this all works out when you get around to adding the RS-1 handrails later.
The cab is credible. With just a few deep cuts below the windows where the black line is seen, and from the corners of the windows down to this line you can fold the window section in after cutting it loose just under the cab overhang. Secure it in place with ACC and then sand the overhang away and trim the cab corners per the prototype. Remove the cab vent and fill the bottom of both fixed windows with a styrene plug about 10 inches high to match photos. Add the drip rails over the cab windows to cover the seam there. RSD1 units had two section windows on both sides of the cab on the ARR.
Drill the side frame rails and use the handrails that came with the RS1 These all fit except the tall extension rail in front of the left cab door. Some careful bending of the stock hand rail and mashing the end into a mounting bracket allows this to reach the corner of the cab above the door.
I made a master for each side of the riveted fuel tank and air tanks. These I cast in plastic and apply them after cutting back offending parts of the frame casting. This will simulates the riveted drop frame and fuel and air tank ends. All the plumbing was added with wire.
Air brake hardware on right
running board Brake chain guides under frame on each side under the cab
were left off to maintain performance.
Control rod for shutters runs from the cab right side on top of the body
to the radiator shutters. The front class lights and number boards were
a standard
adaptation to the Alaska Railroad Alco fleet.
For a parts list, and detail construction photos, make your request direct on line to sewtrain@mtaonline.net.