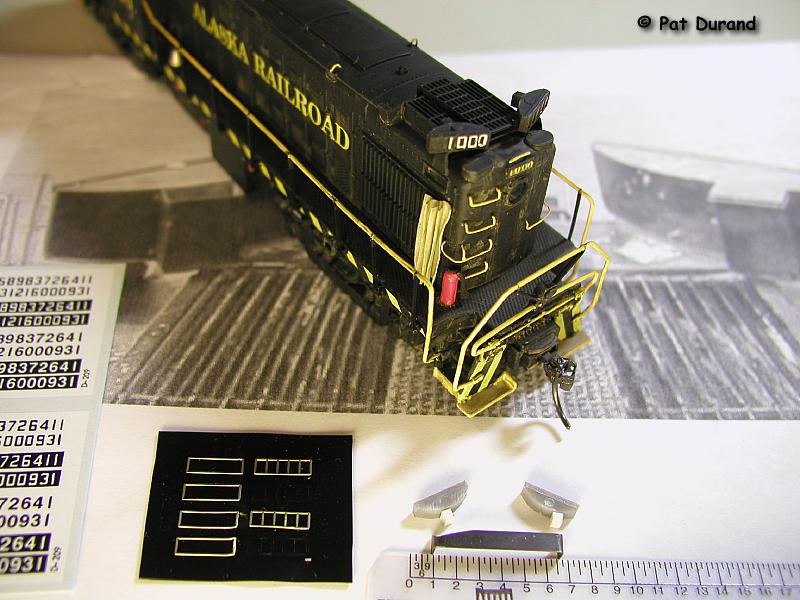
Within three months of arrival in 1944, Alaska Railroad's first Diesel Locomotives #1000 & #1001 received their first modification. Harriman style round back number boards were added just forward of the fan grill on top of the long hood. These boards became a standard feature on early power and are well worth the effort to model. Here is a step by step guide to doing the job on the Atlas Alco RS1.
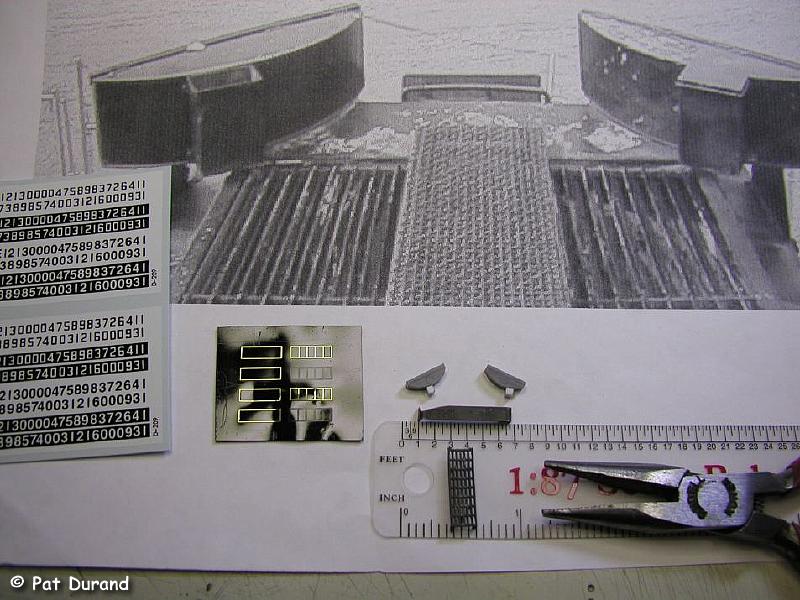
I use Detail Associates NB 2602 Number Board kit for starters. You may prefer the Details West NB 156 cast in white metal and requiring less fabrication. These instructions cover use of the former. The small white blocks behind the boards represent the number template storage box and are made from scale 6X6X10 inch styrene blocks.
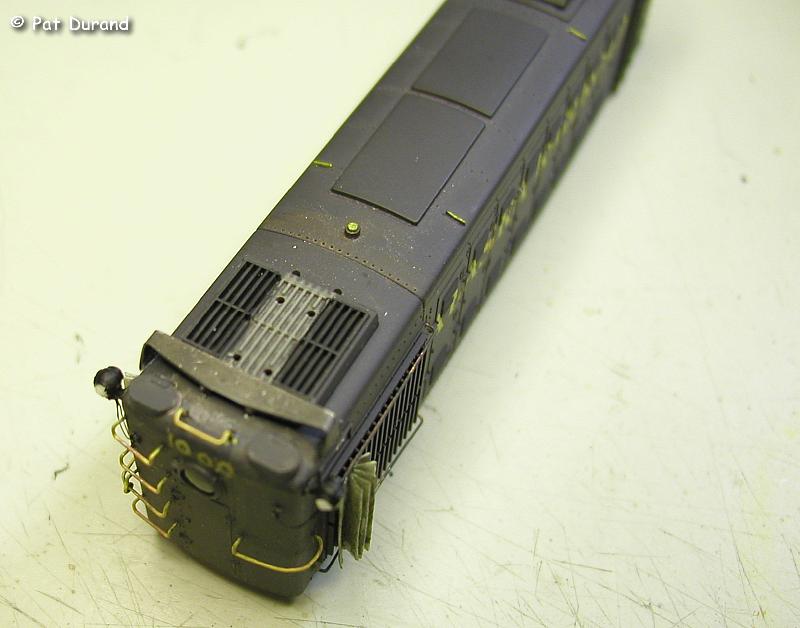
The flat bracket follows prototype in that it is one piece of 1/4" flat sheet 10" wide and 5' 7" long between the legs that were bent down at each end. The front corners are cut away at an angle to clear sander hatches and to match the front edge of the number boards that were then bolted to the top of the bracket. Special Shapes #76116.05022 is flat brass strip that scales 1" by 10". Use a piece about 8 scale feet long and bend the basic shape to the proper length to span the nose of your locomotive. Now you can file the excess material from the bottom of the legs and shape them to final fit. Use a file to cut the angle on the front corners of the bracket, at the leg, to match photos for a proper fit of the angled boards. On the RS1, pop off the fan grill walkway and cut off the two front legs. Use these to fill the holes they came from and trim them flush with the top of the grill housing. Trim the bottom of the walkway until it fits back over the bracket properly. Affix the bracket with ACC so it sits flat on the top of the grill housing and the legs just touch at each end. Snap the walkway back in place.
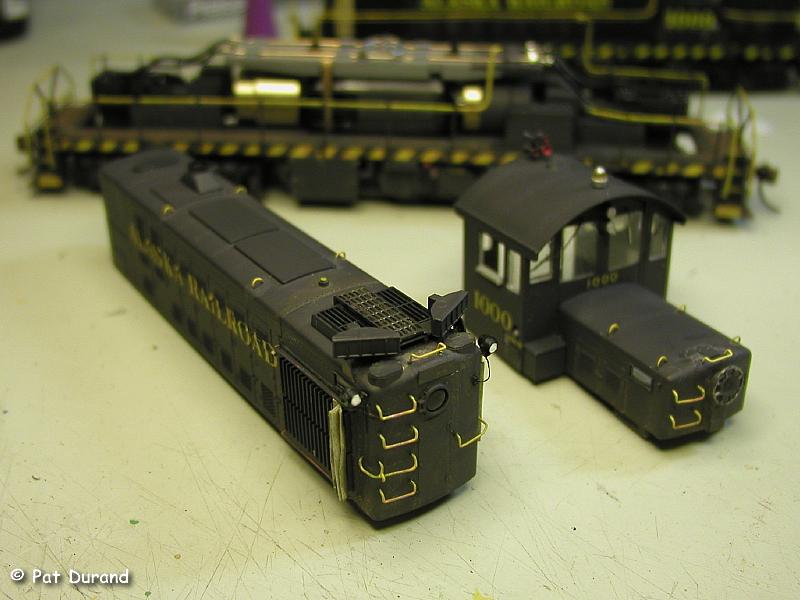
Eye ball the number boards into position and fix them with ACC. Hold the etched brass frame in tweezers and apply thin beads of ACC on the long edges with a needle and drop them on the face of the number boards. When working with these small parts you will find it advantages to add small stuff to bigger assemblies, rather than put a bunch of small parts together and then try and mount them on the model. I think I said that right.
Add the number template storage box to the back of the number board with plastic cement per the photos. Paint the assembly and then apply gloss finish to the glass area. The final touch is inserting the decal numbers, after deciding if your locomotive is running as an extra i.e. X plus the loco number or if it is on a scheduled train. If the latter, there will be a single digit displayed such as number 3 on the southbound Whittier local and number 4 on the north bound. For many years the two RS1 locos were dedicated to this run through the long tunnels into Whittier.
Try it, you'll like it!
Patrick J. Durand