


142. Porter Number 1101 in storage beside the Anchorage roundhouse with a can over the stack. Note the Porter plate under the radiator on the end.


Walter Strong
|
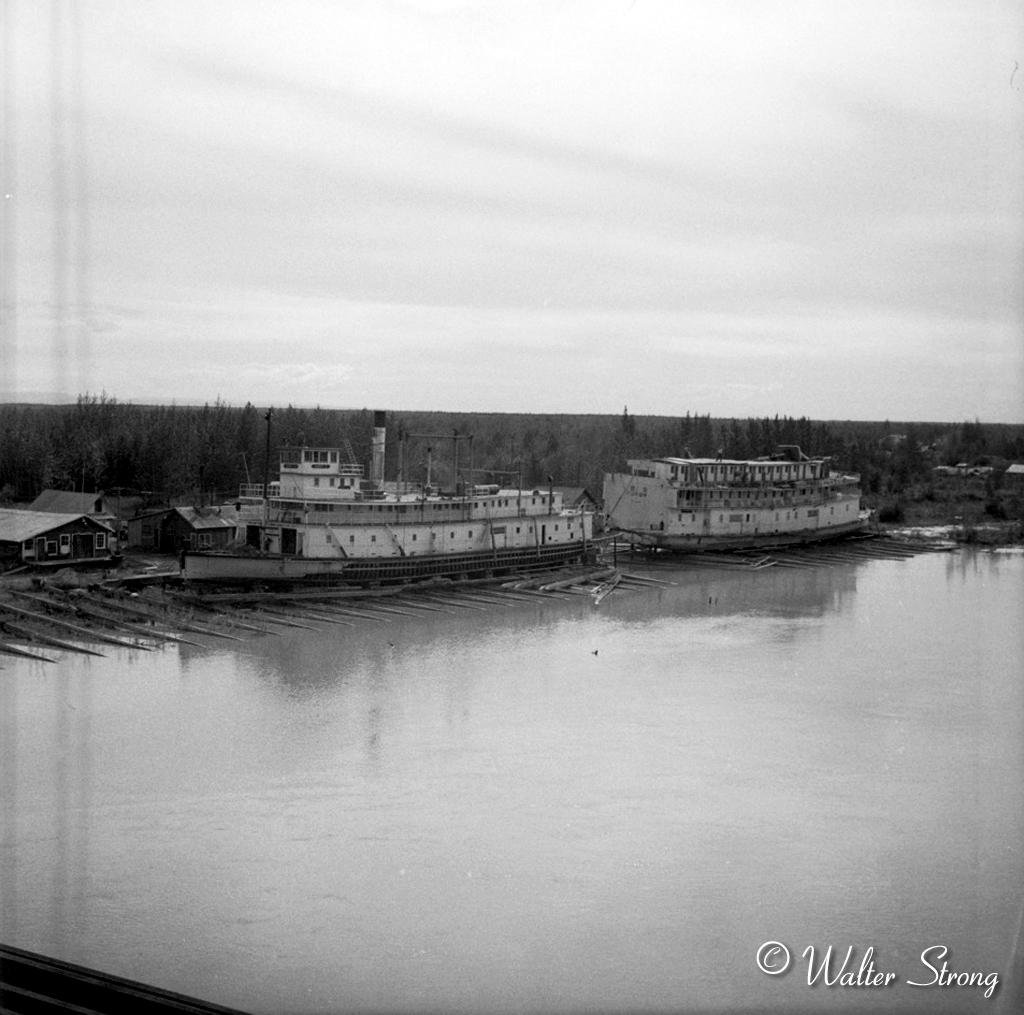
121. The marine ways on the south shore of the Tanana River were one of the few dry spots during flood stage. The ARR main line passes just behind the cabins and then swings away from the river and begins a long spiral curve to return the Mears Memorial Bridge. This photo was taken from the deck of the bridge. |
|
122. Mears Memorial Bridge from the Nenana Ridge (Fairbanks) side at high water stage. At the far right you see the size of the fill required for the southern approach. The single span is 702 ft, the longest of its type in the world when completed in 1922. Notice the crew working on the top chord of the bridge. Must be mid afternoon as the sun is coming from the West casting a shadow on the river surface. |
|
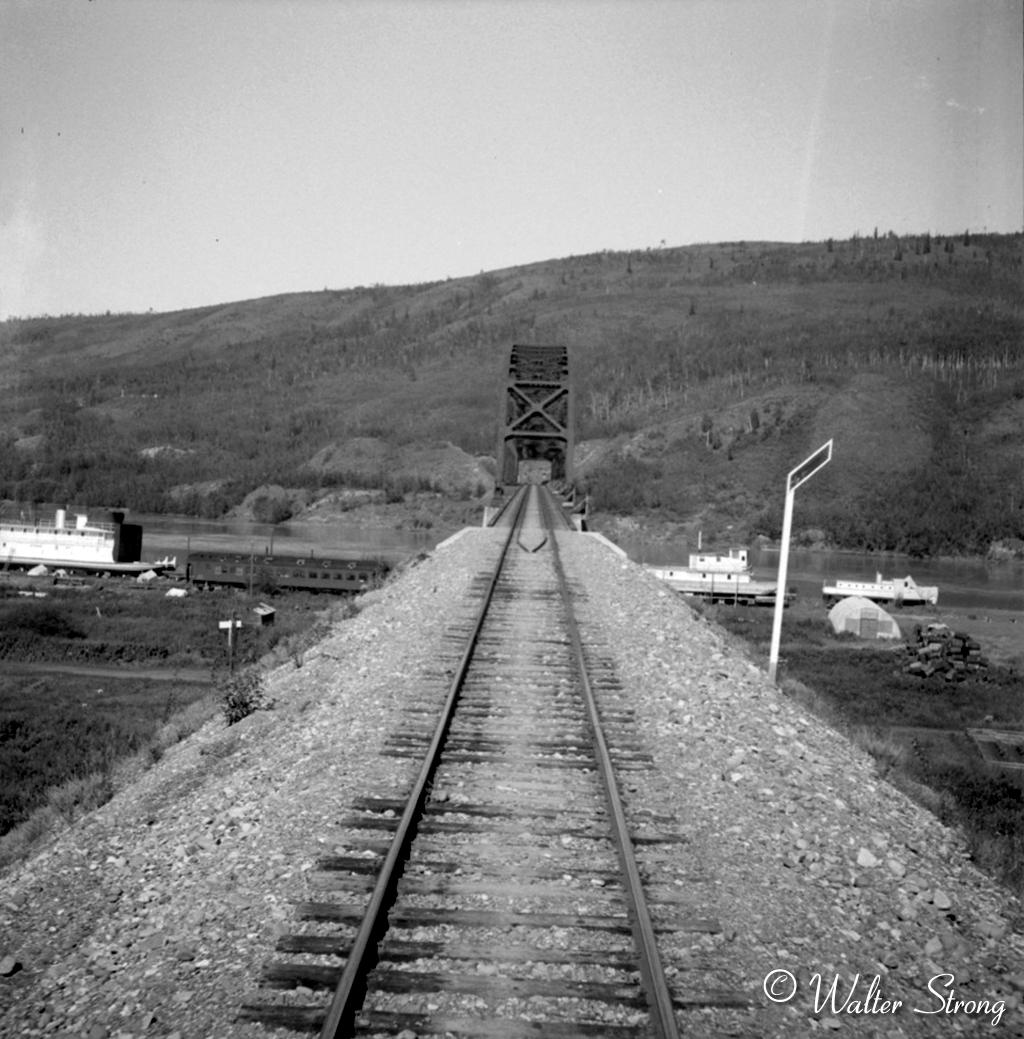
123. Mears Memorial Bridge from the South side fill looking across the river to Nenana Ridge. Barges and tugs are still out of the river on the marine ways. An old coach is parked at the end of the dockside spur. |
|
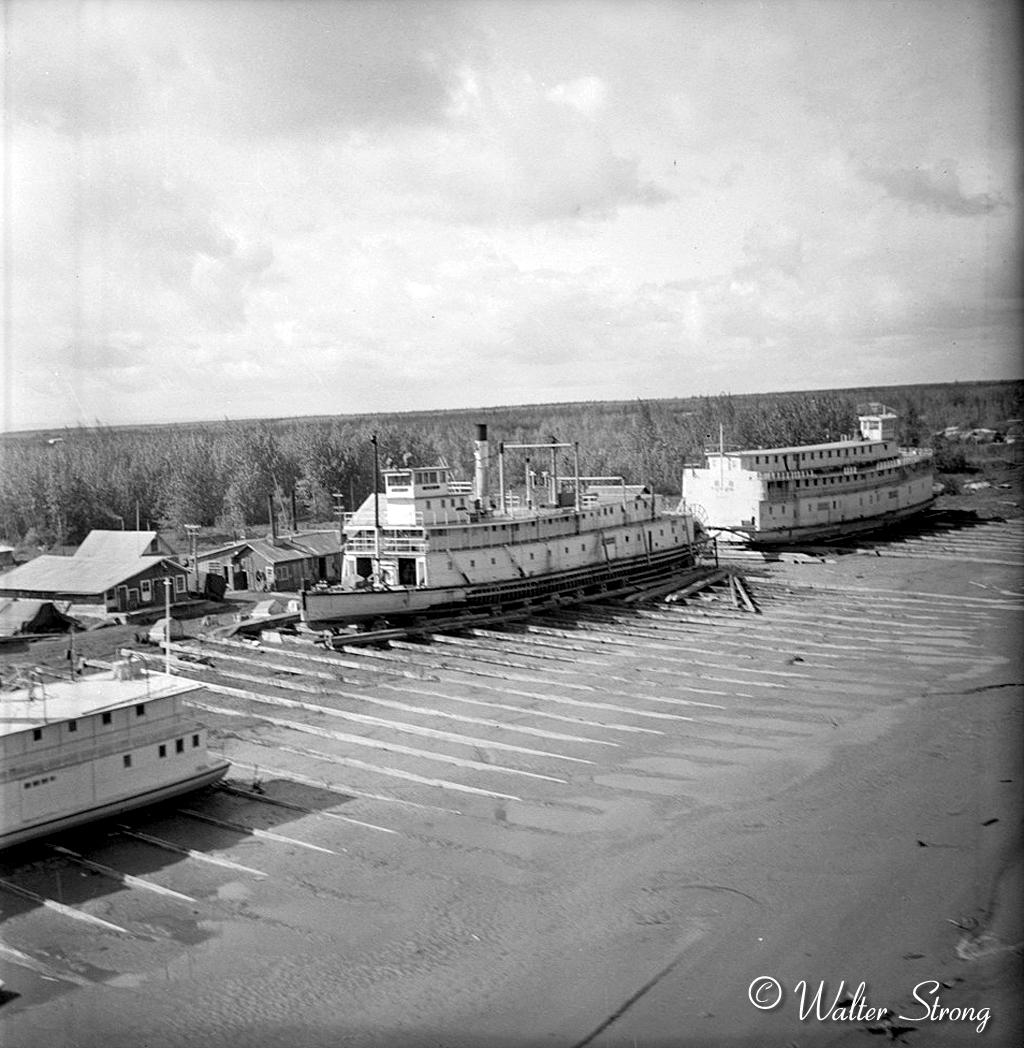
124. Nenana marine ways during normal water level. The vessel in the middle appears to be getting new hull planking. The last boat in the row appears out of service. |
|
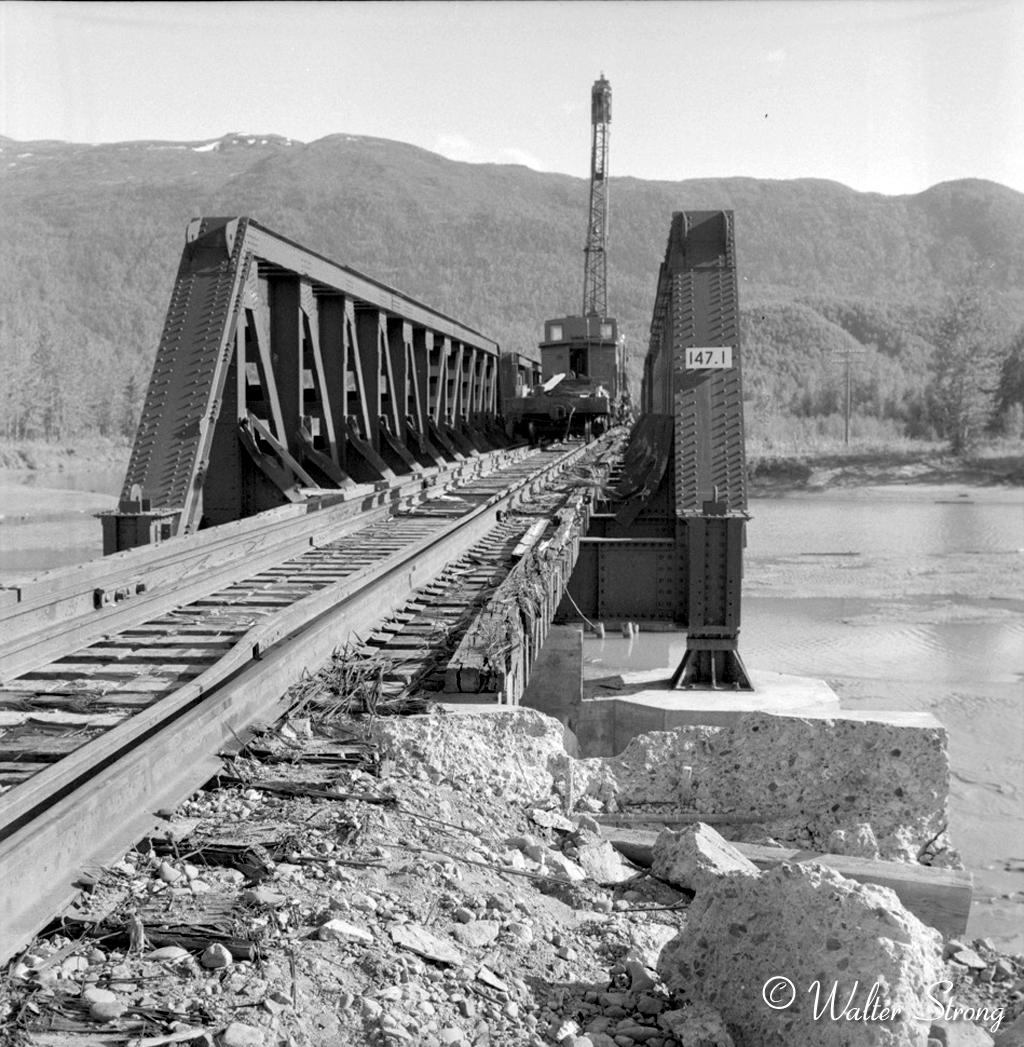
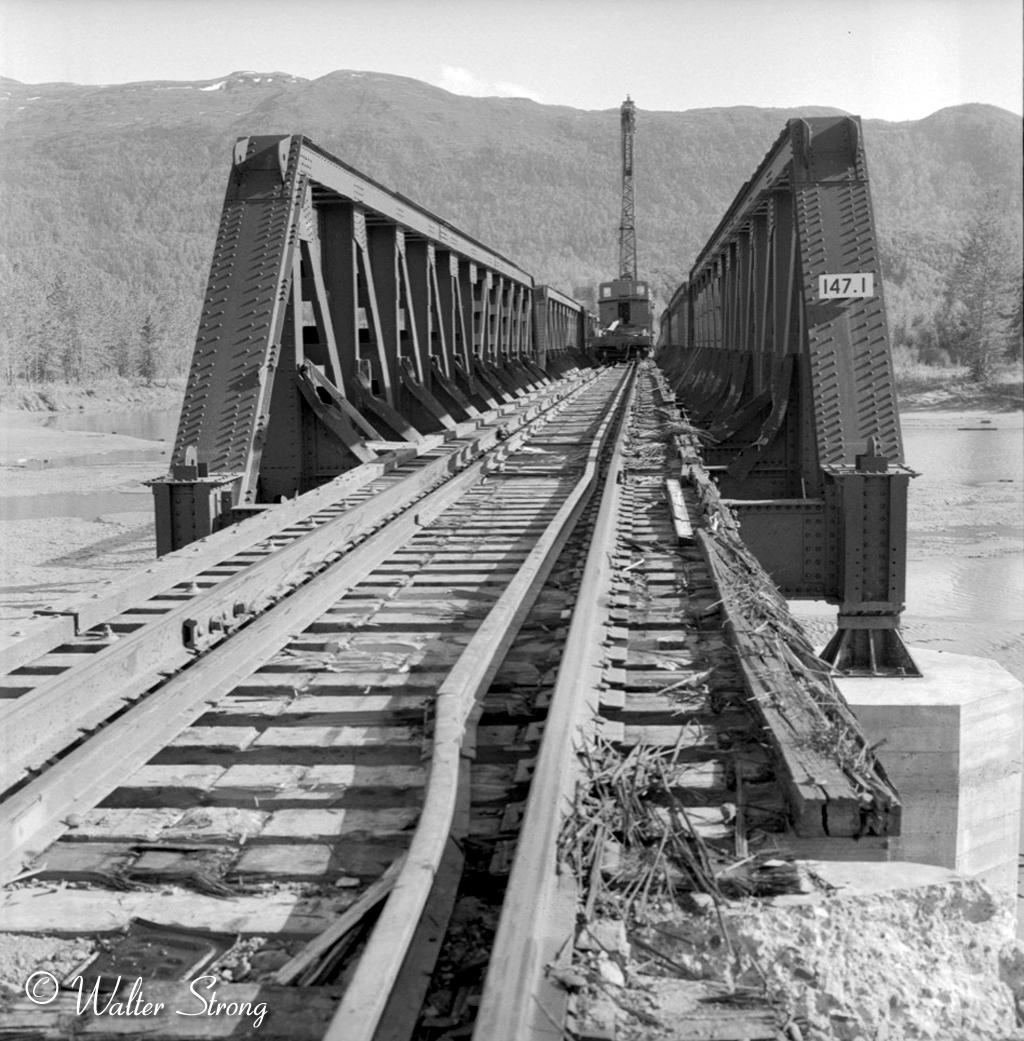
125. B&B gang is inspecting the Matanuska River Bridge at MP 147.1 where something has run down the the ties and shattered part of the abutment. |
|
126. It is obvious the guard rail has taken a beating and the side girders have been adjusted. |
|
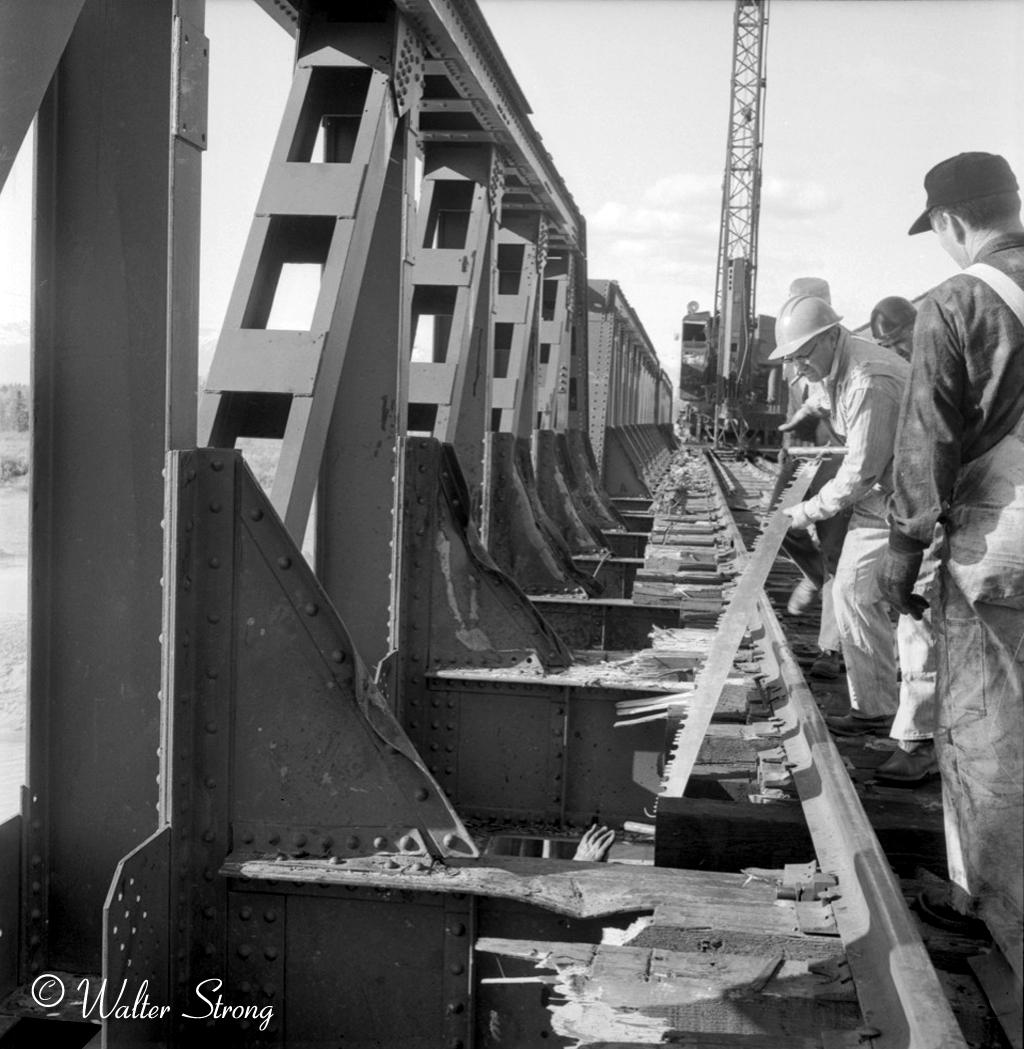
127. B& B gang is working in the deck replacing bridge ties and checking damage. |
|
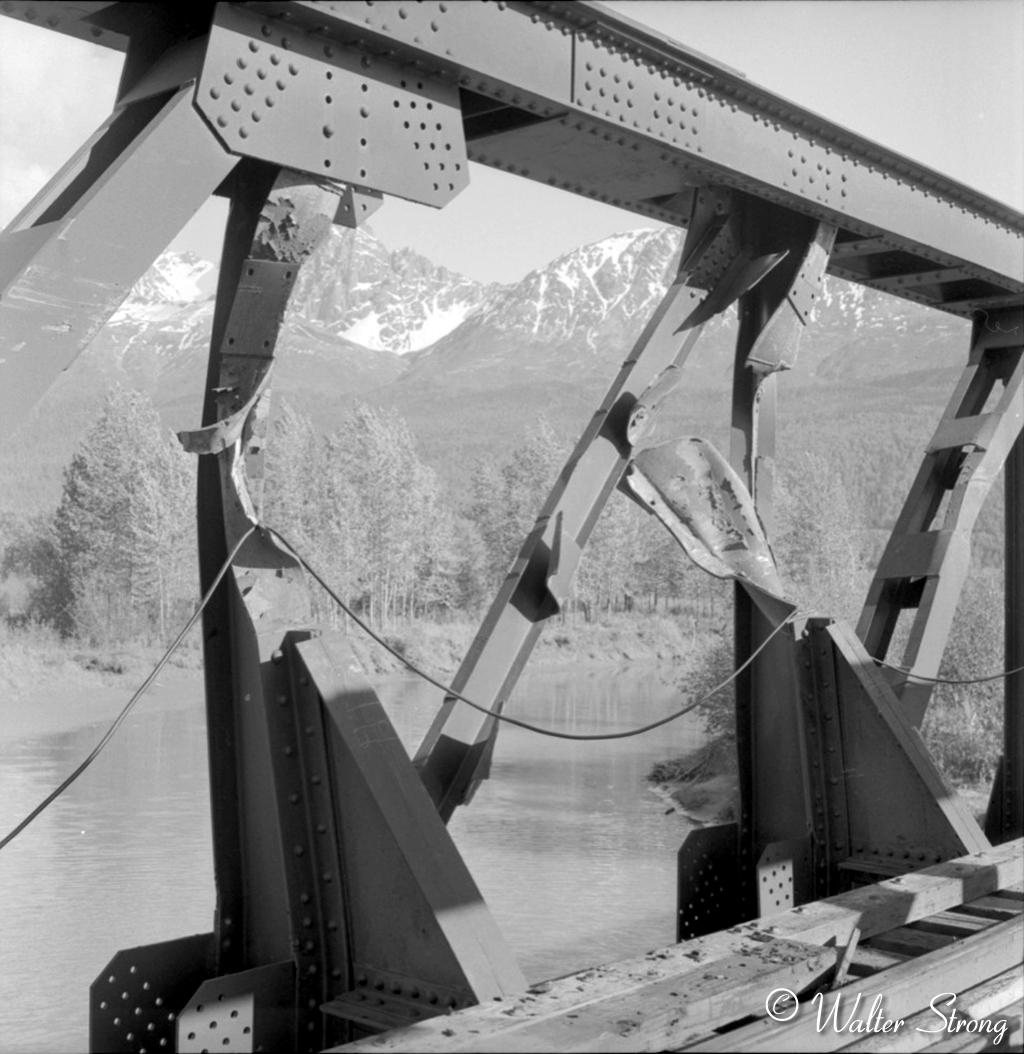
128. Oops, more than just an adjustment these girder members are badly damaged. How many ways can you say "unsecured load"? |
|
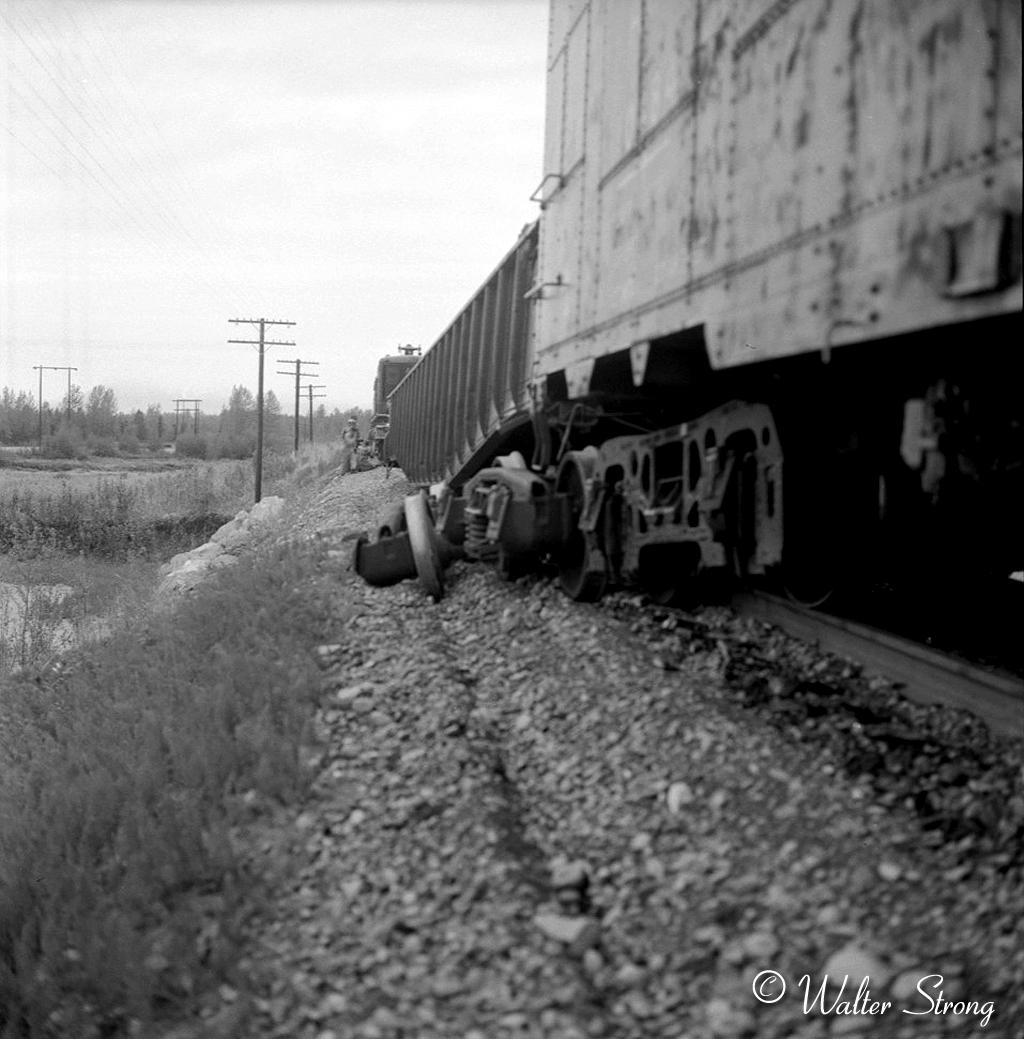
129. On the Matanuska side of the bridge there are several derailed cars. |
|
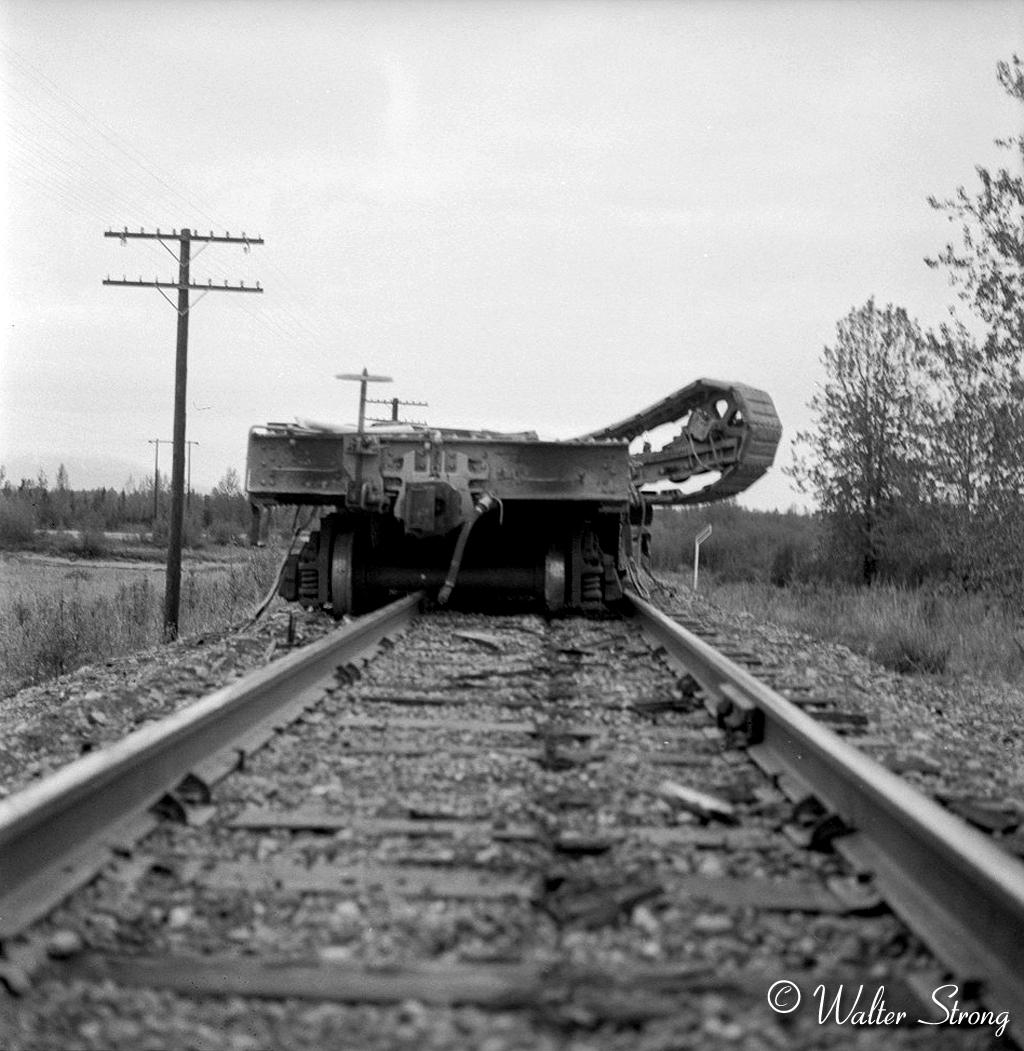
130. This derailed flat has been riding the ties for some time and there is a strange object protruding from the side of the car. This protrusion was probably what had caused the bridge girder damage. |
|
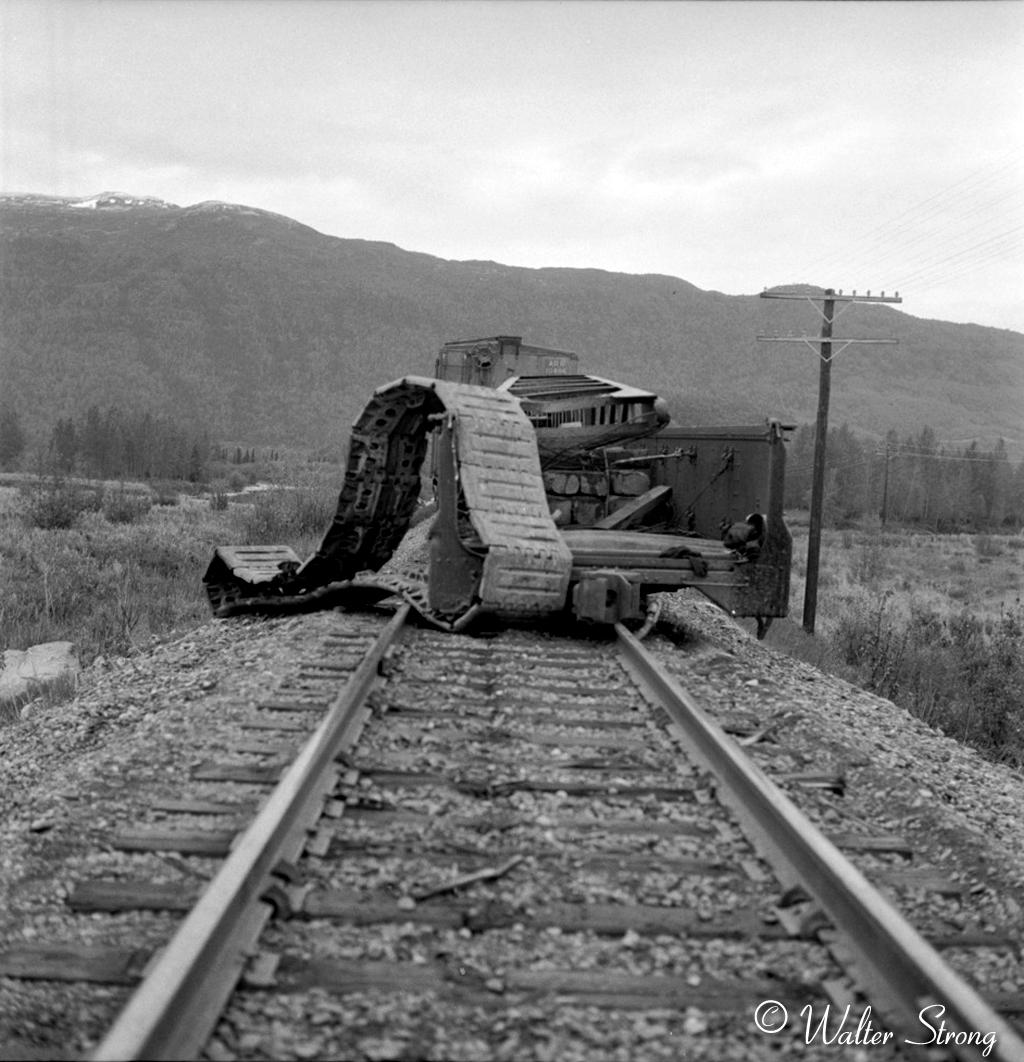
131. Looking back toward the damaged bridge is another protrusion and this one is unmistakable. A smooth crawler track (no grousers) is wrapped around the end of this derailed mill gon. In the mill gon is the stick for a crane, carefully cradled on cribbing. Where is the crane? |
|
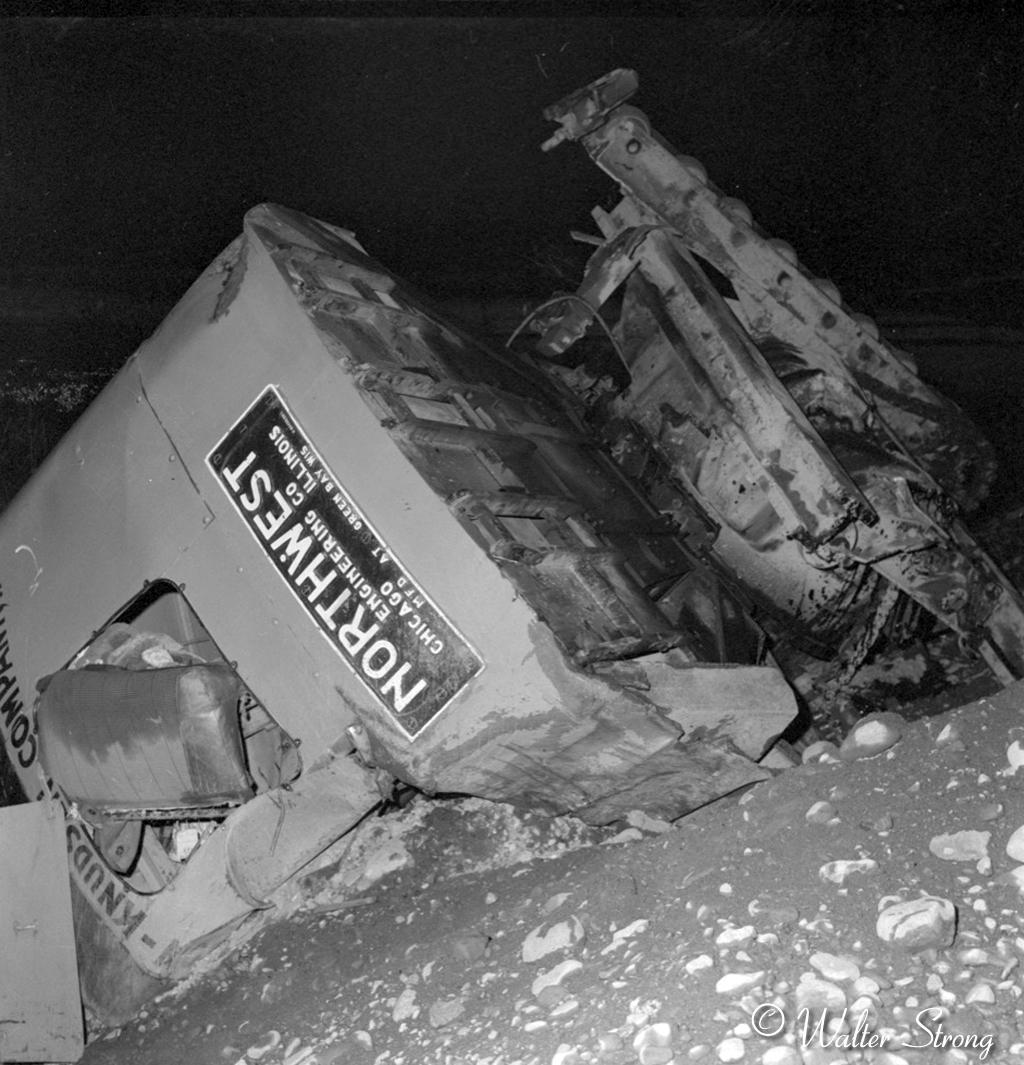
132. Do you recall the Northwest shovel being off loaded from the barge in Whittier? Here we can see the same or very similar machine belonging to Morrison-Knudson Company upside down in a ditch. No indication exactly where and this photo was taken at night with the aid of a flash, probably by the first investigation party. If proper loading protocol was followed it would have been car body forward with stick following on the flat car. The mill gon with the extra crane stick was following. The load was obviously not secured properly and the shovel got dumped between the Knik and Matanuska bridges. It is a good thing the shovel left the car. Had it been off center on entering the bridge it may well have dumped the bridge spans off their piers. Can't wait for some one to tell us the real story now. |
|
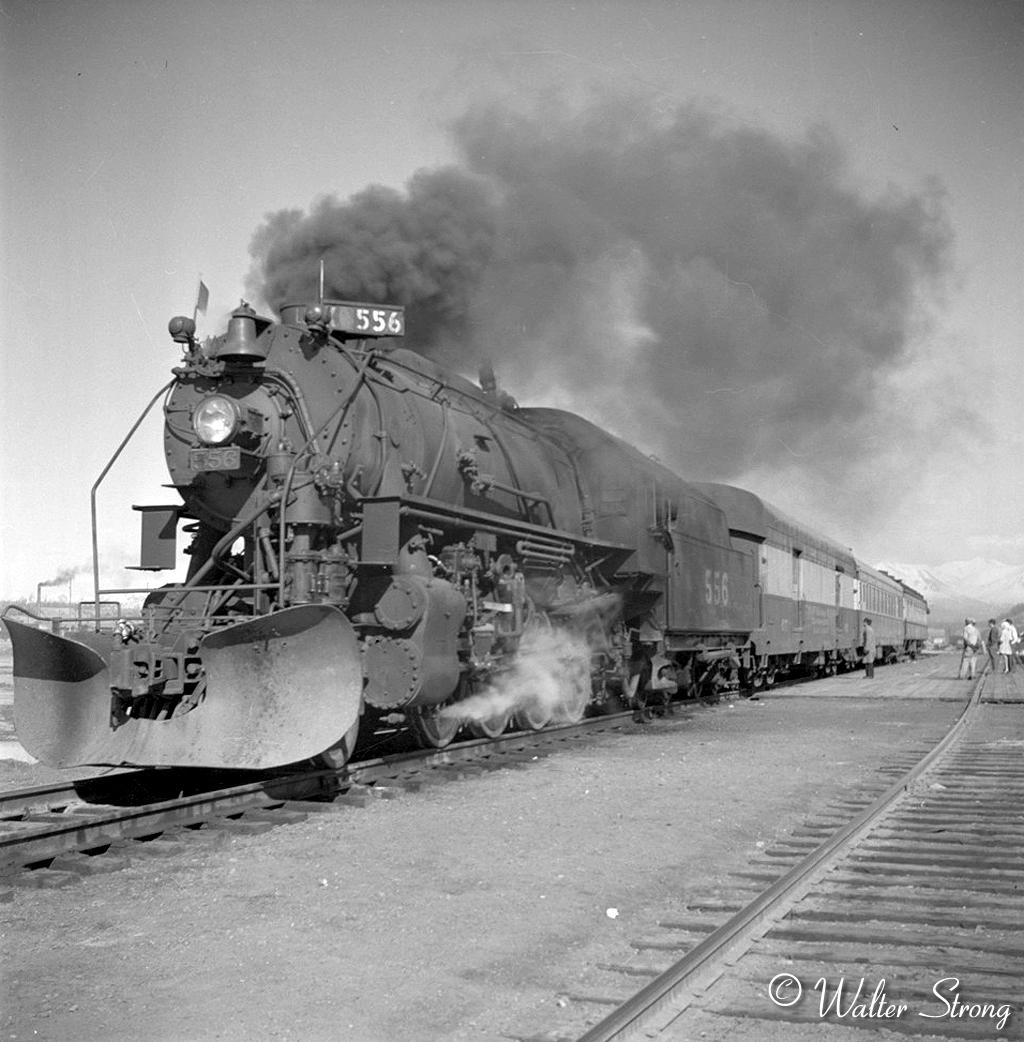
133. Locomotive 556 on the platform at Anchorage with a short train. Looks like old baggage, a hospital coach and possibly the Seward observation car on the end. She is pointed RR South. |
|
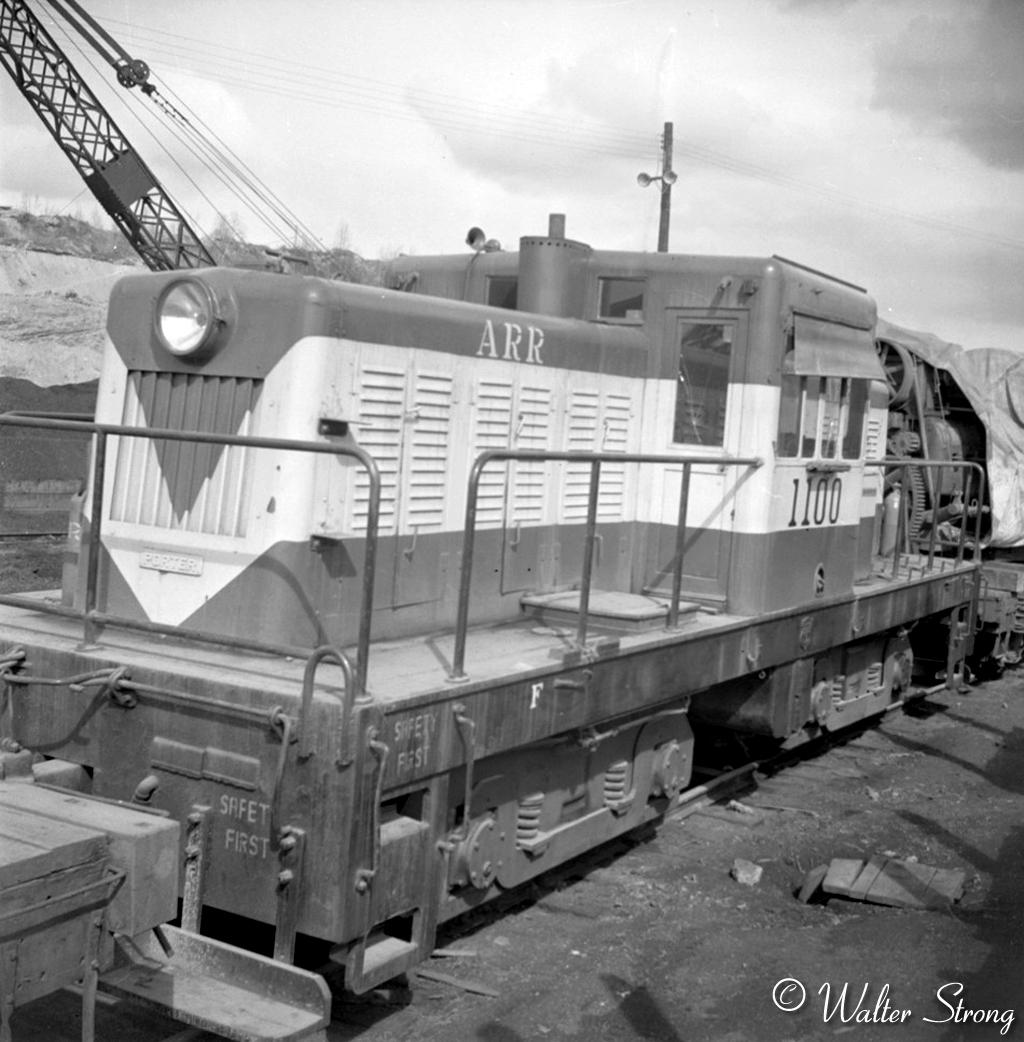
134. Porter locomotive number 1100 stored in the Anchorage Yard. |
|
135. Alaska Railroad 701 nearing retirement. The booster on the trailing truck is long gone and she is now equipped with a home built vestibule cab. Probably in the Anchorage yard about 1950. That is a 1948 caboose connected to her. Lets have a talk with risk management about that disorderly mess of rebar stored right where a trainman could step off into the tangle at night. |
|
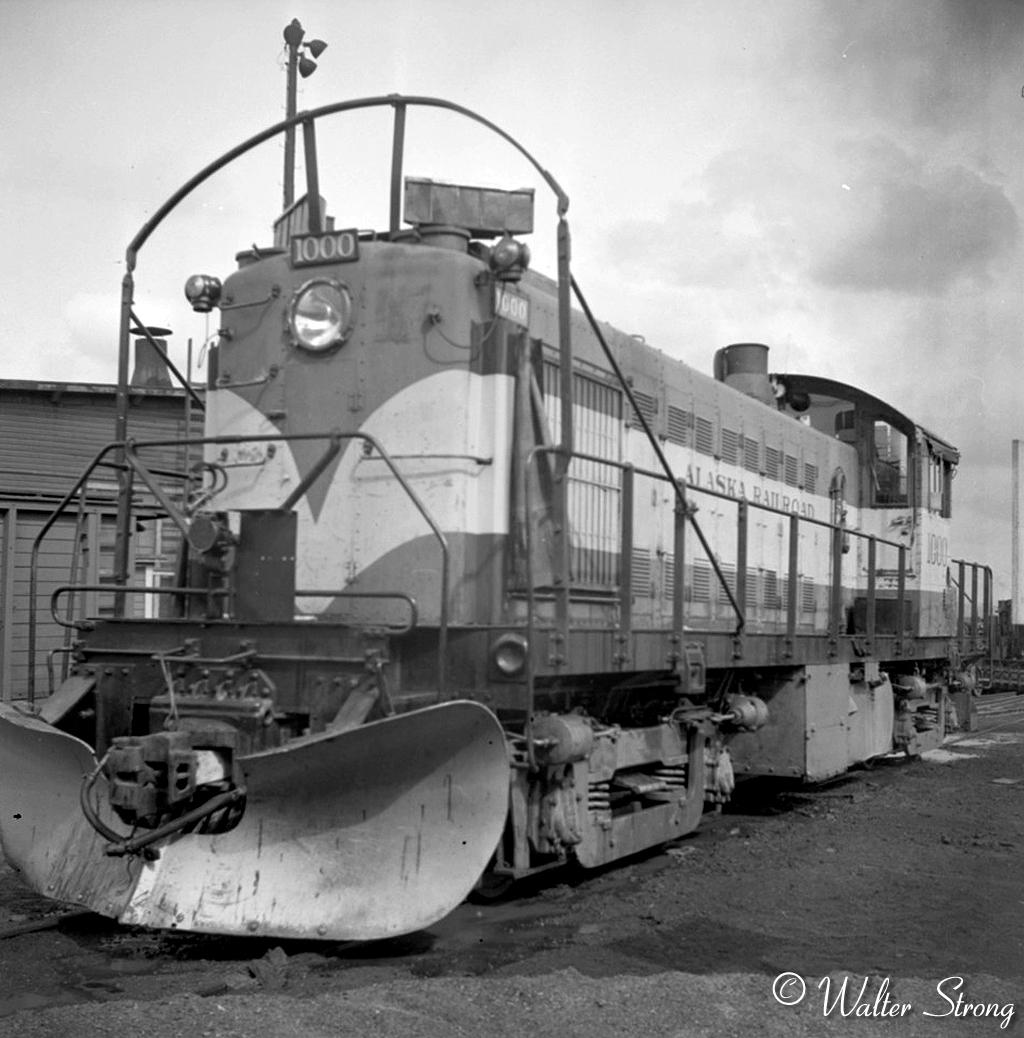
136. ARR #1000 is one of the two RS1 ALCO locomotives that made up the first order of diesel locomotives to arrive on the road. The blue and yellow paint scheme is augmented in this photo with gray trucks, battery box and fuel tanks. Shown here next to the Anchorage roundhouse, she spent most of her early years on trains in and out of Whittier. The extra iron arch at the front is an ice breaker to knock down ice from the ceiling of the Whittier tunnels before it could break out the cab windows. |
|
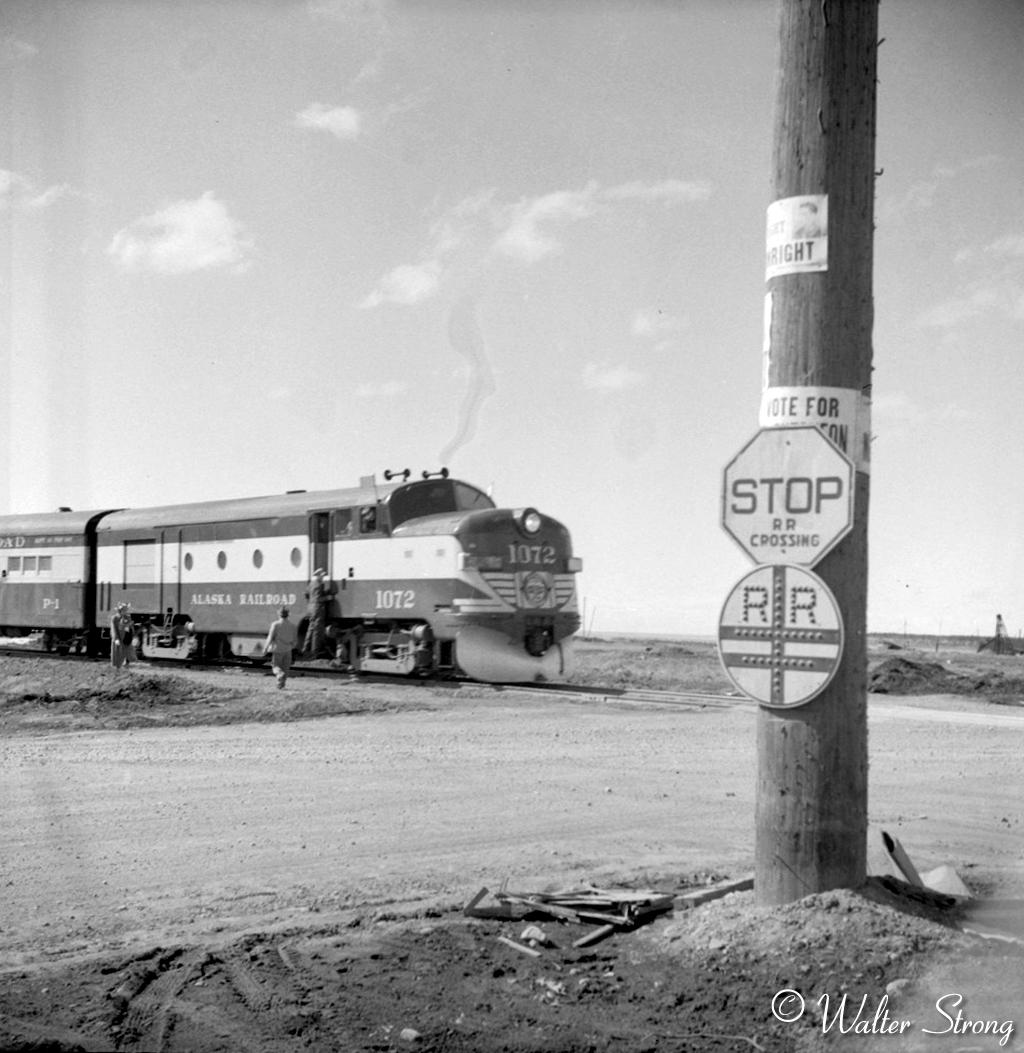
137. RF1 #1070 with power car P2 are holding short of the C Street crossing while the passenger train loads for a North bound trip. The P2 contained steam generators need for heating an air conditioning in the old passenger fleet. Must be voting season, as campaign signs are plastered on the sign post. The top one looks like Don Wright. |
|
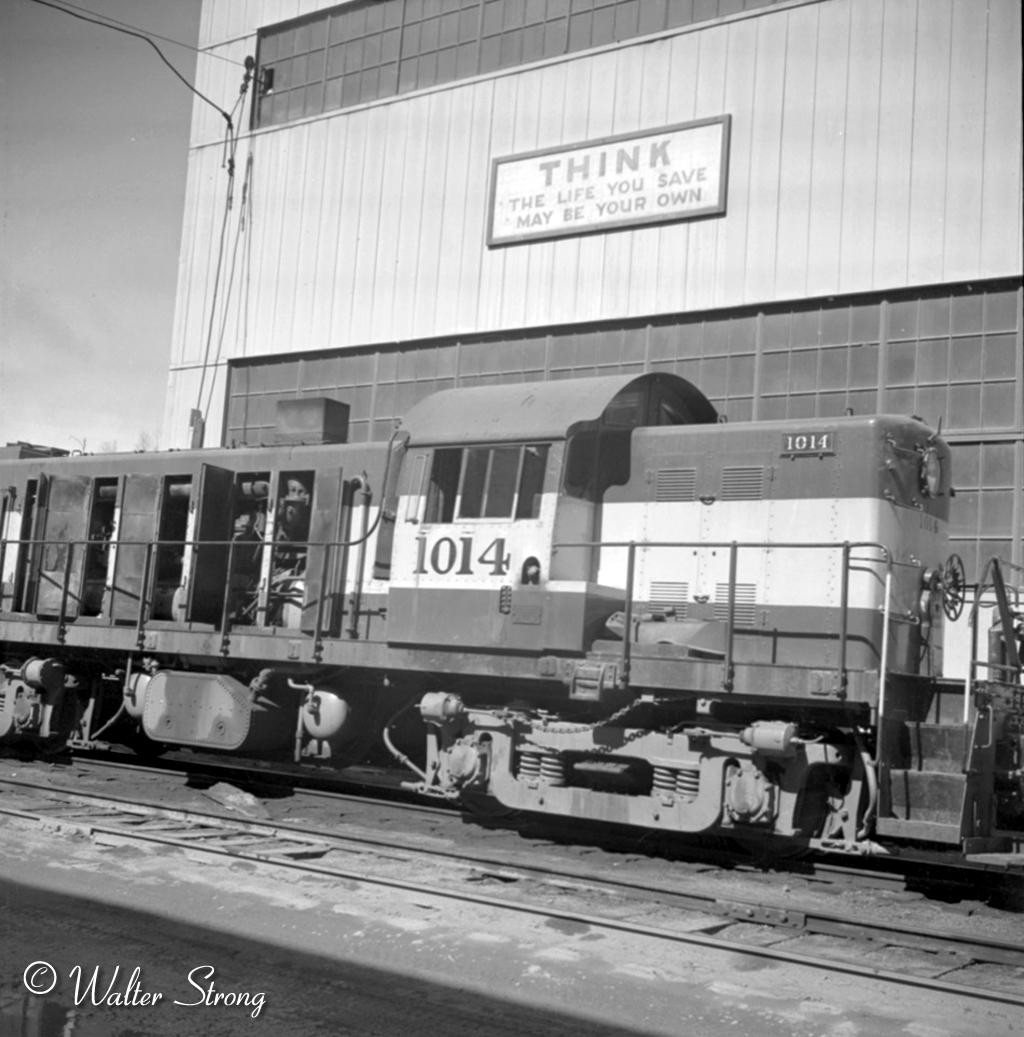
138. 1014 next to the new diesel shop. This is one of many RSD1 locomotives obtained surplus from the MRS. They arrived with the signature narrow cab roof line and 6 wheel trucks. As soon as four wheel AAR tucks were available they were substituted for a smoother ride and less wheel wear. |
|
139. Locomotive 1036 is another RSD1 with its original trucks, narrow cab and odd shaped fuel tank. The weather curtains were added over the shutters to keep them from freezing up the controls in the winter. General freight service kept these in black paint with yellow trim. |
|
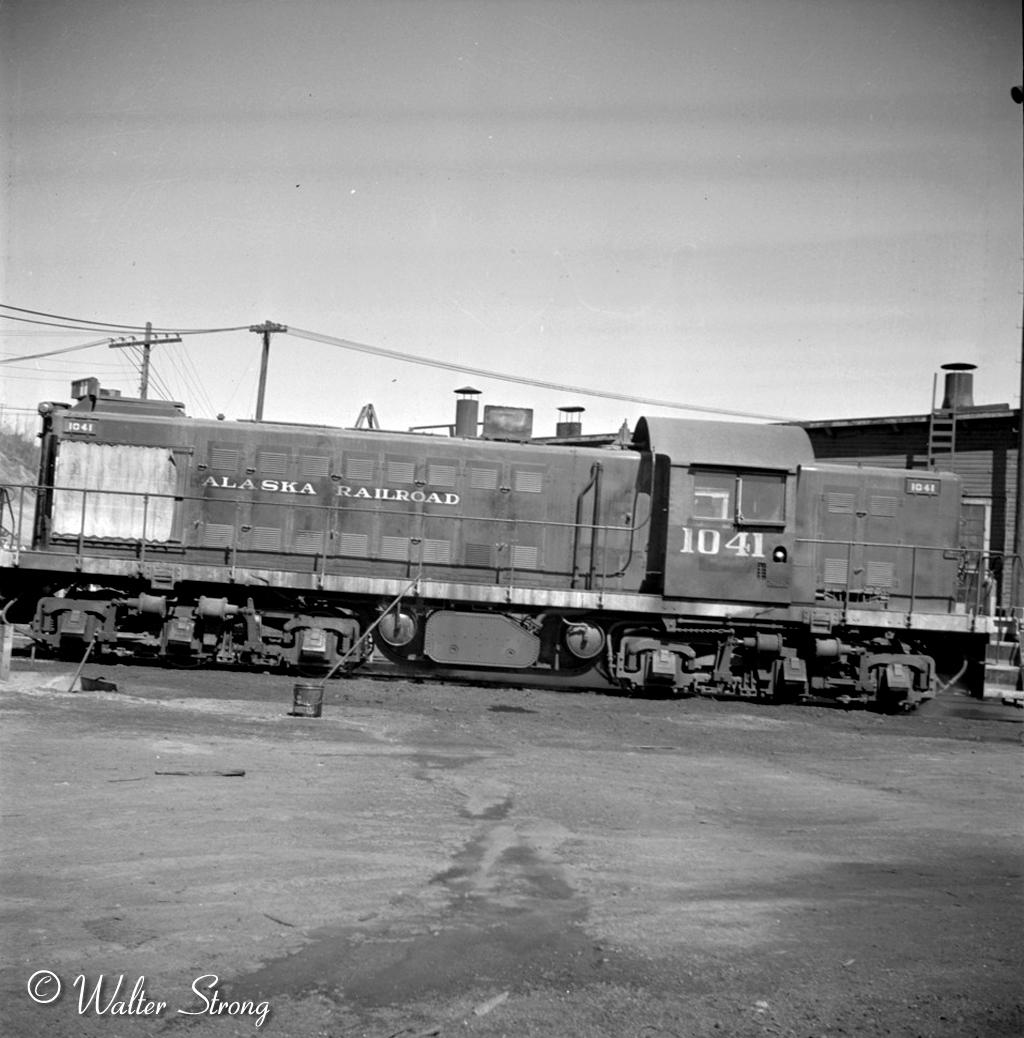
140. Locomotive 1041 is an RSD1 on 6 wheel trucks. The close clearance cabs had notches at the corners of the cab roof to avoid head bangs. While the RS1 units 1000 and 1001 had a three section window on the fireman's side the RSD1 units all had a two section window. |
|
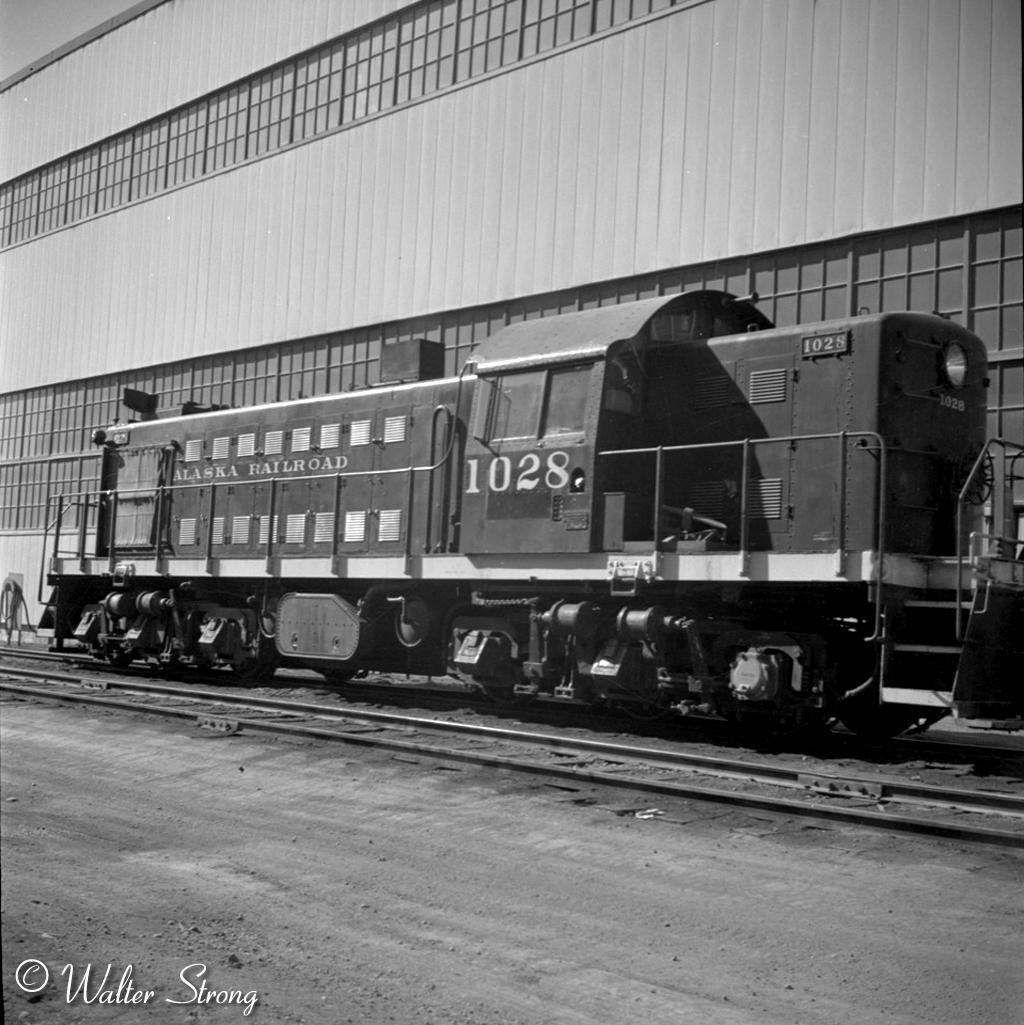
141. ARR RSD1 Number 1028 here in fresh black paint out and yellow trim is still on her original 6 wheel trucks. She would soon be out fitted with 4 wheel AAR road trucks. The railroad found the shorter wheel base trucks better riding and easier on wheels. |
|
142. Porter Number 1101 in storage beside the Anchorage roundhouse with a can over the stack. Note the Porter plate under the radiator on the end. |
|
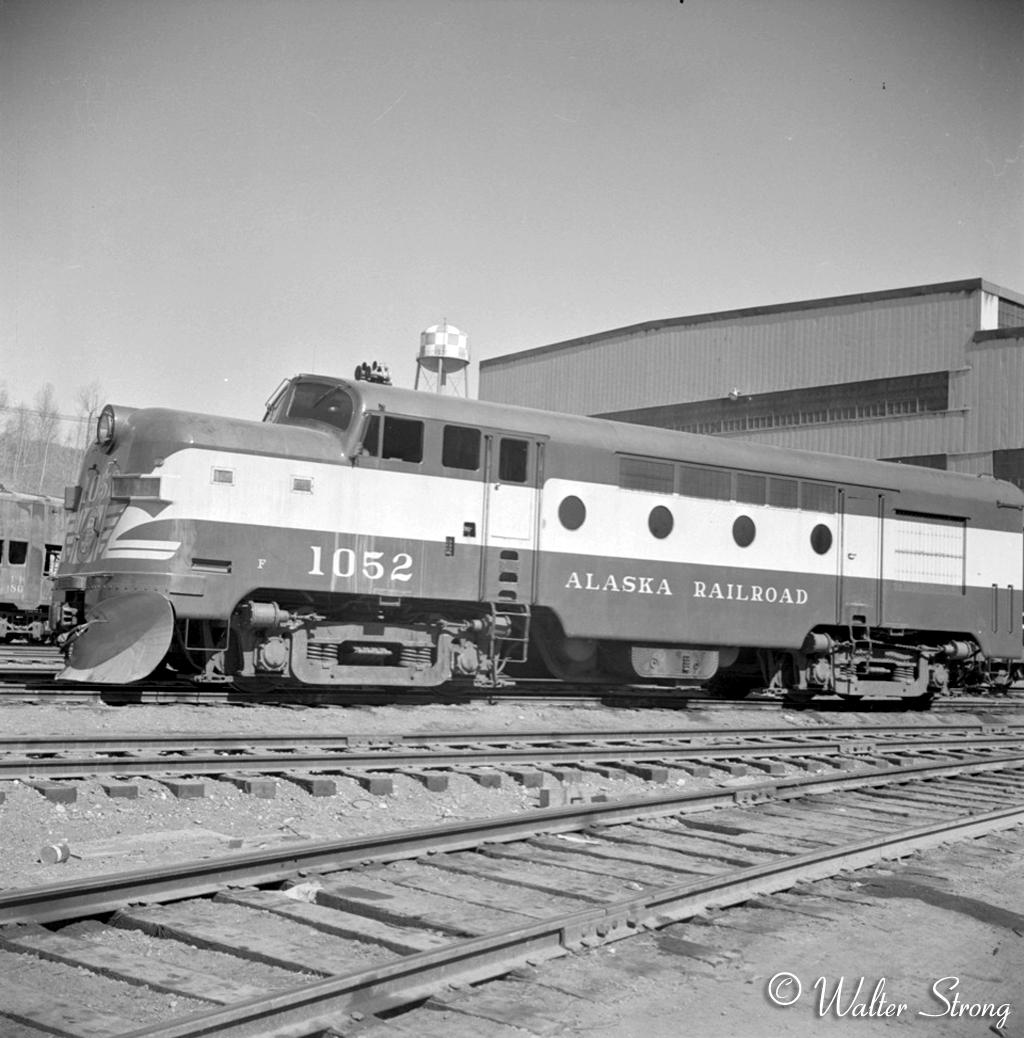
143. Alaska Railroad RF1 1052 was a vast improvement over the embryonic 1050 attempt at a shrouded passenger locomotive. Very handsome on the outside. The cab had five seats and room to hold a dance. The engine room retained much of the sheet metal frame work of the former RSD1 locomotive on which the new skin was applied. |
|
144. ARR RF1 A Number 1070 along with an RF1 B are on the ready track at the Diesel Shop in Anchorage. |
|
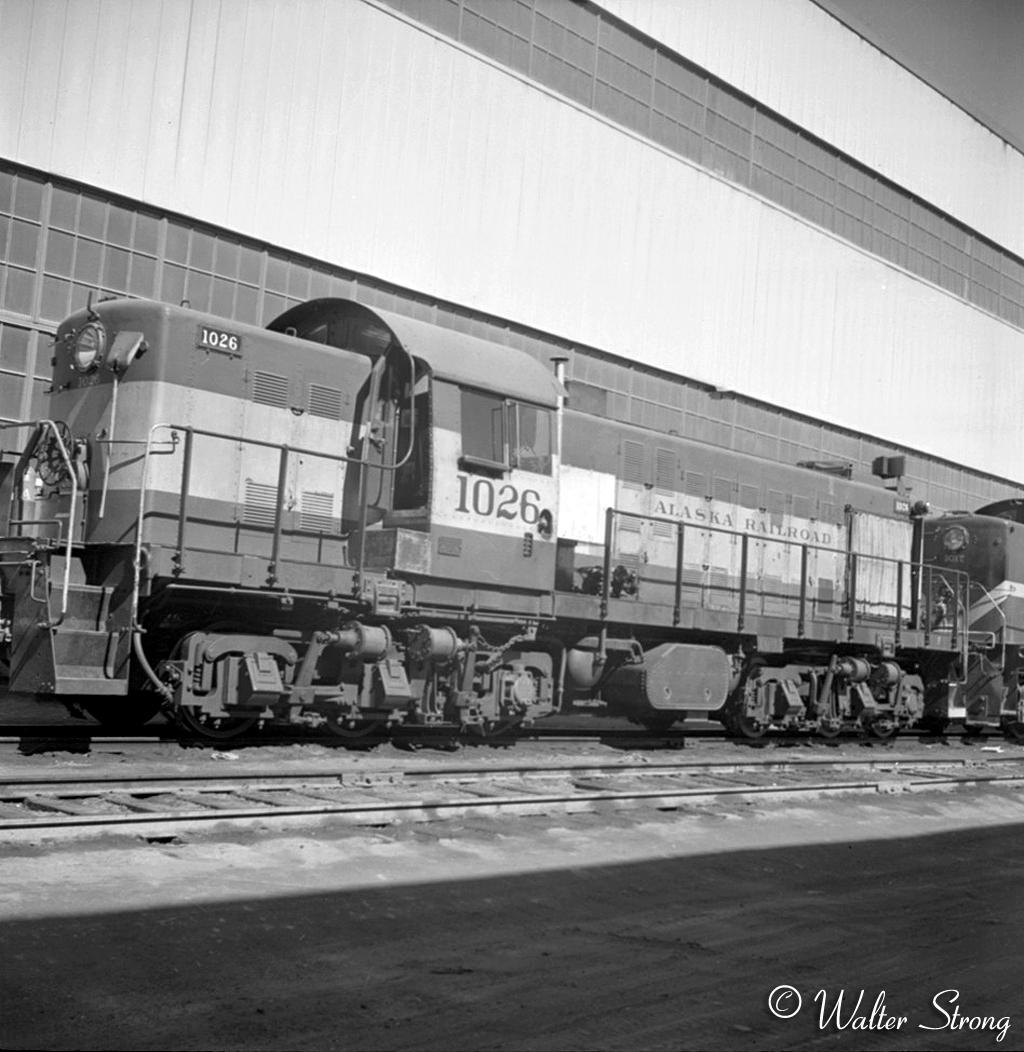
145. ARR RSD1 Number 1026 models the blue and yellow paint scheme, showing the strait band across the end of the short hood. On the long hood the yellow dipped in a sharp V. This loco also has a cold start heater unit on the running board right in front of the cab. You can see the hand rail comes up short and the stack extends just above the cab. The next unit in the line had an odd paint job with a narrow yellow stripe. |
|
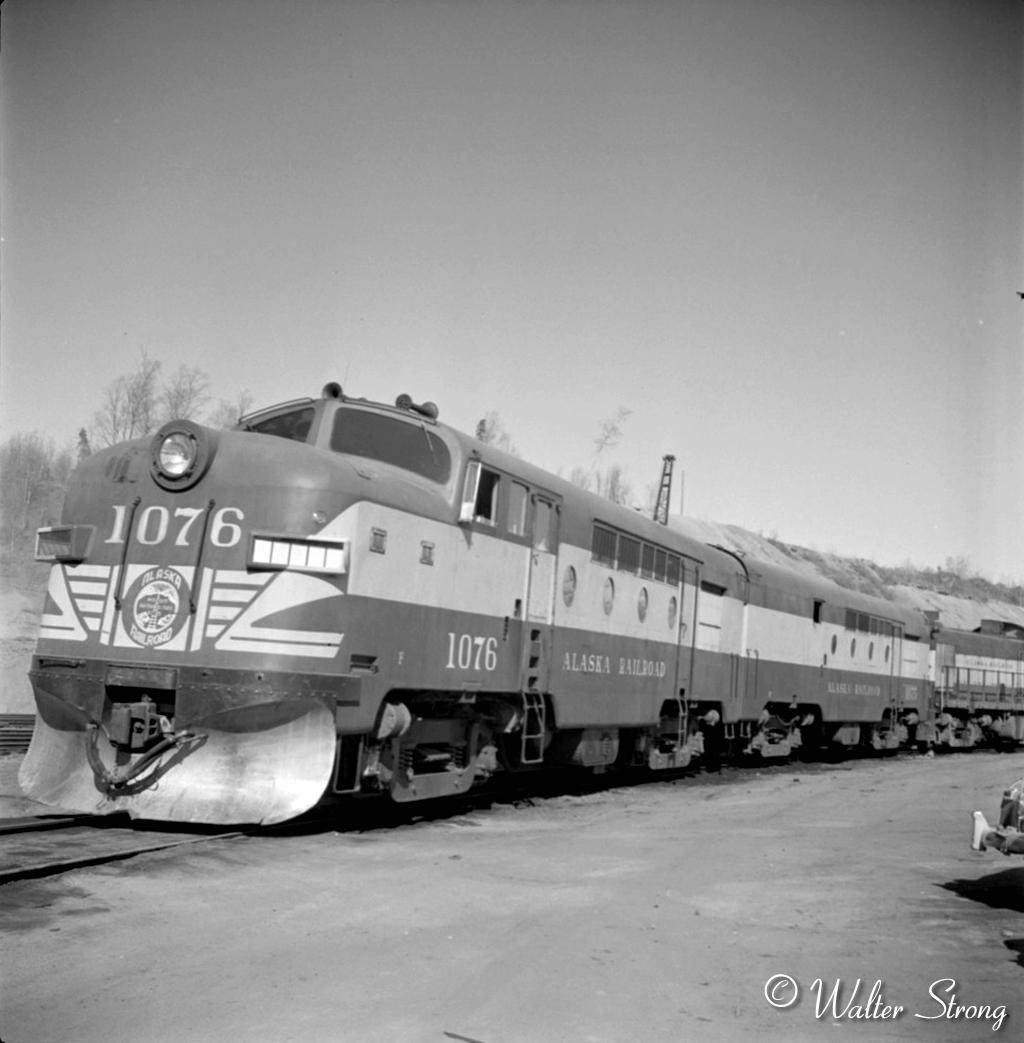
146. ARR RF1 A Number 1074 and 1075 B with power car P4 are all lined up at the shops ready to head out a North bound passenger train in this early spring shot. The classic land scape feature was the railroad water tower painted in checkerboard orange and white on government hill. The high visibility paint job was required as it was near Elmendorf Air Force Base. |
|
147. 556 on the Anchorage platform. |
|
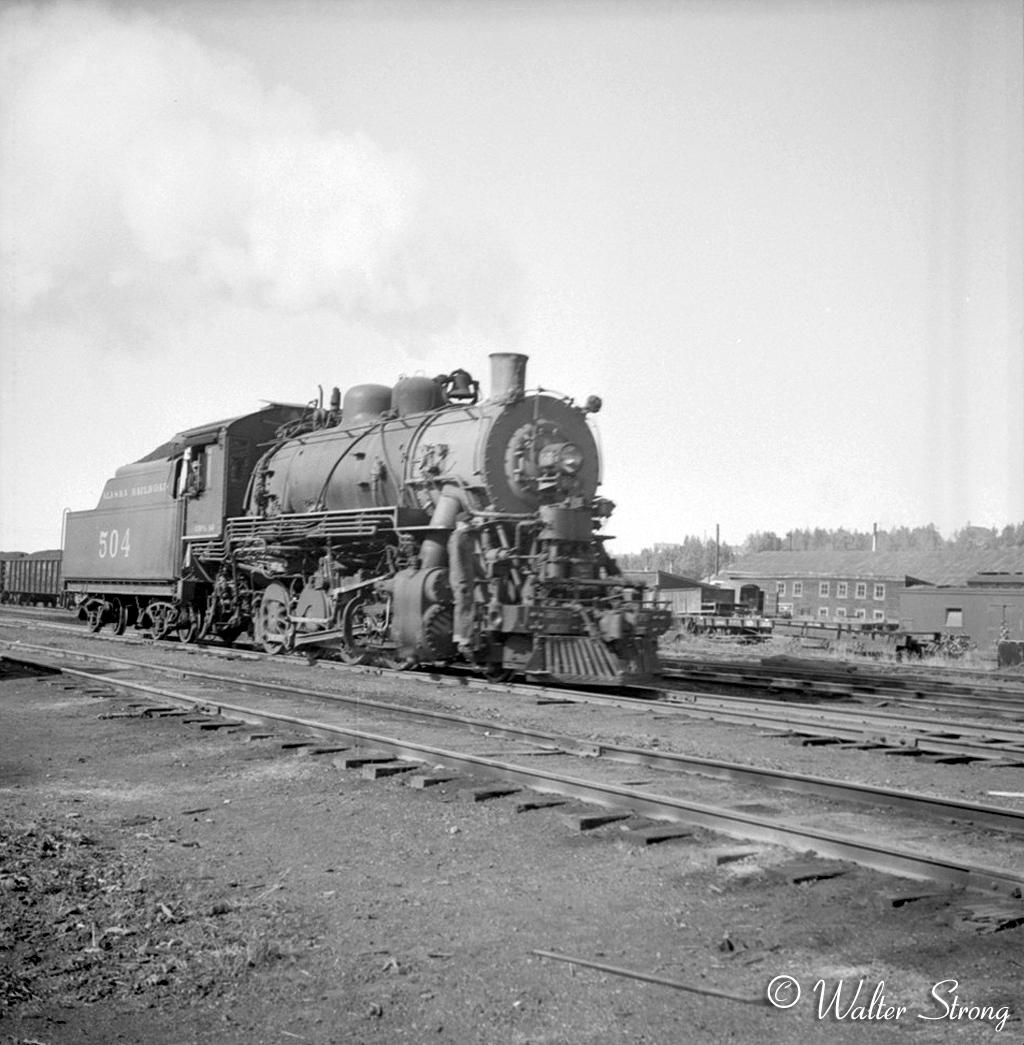
148. The 500 class Consolidations were renumbered to the 400 class to avoid confusion with the 550 class Consolidations. Number 504 is working the Anchorage Yard with a three man crew. The position of the compound air compressor cross mounted on the front pilot was unique to these engines. The two distinct domes made them easy to spot in comparison to the 550 class GI consolidations with their low domes. |
|
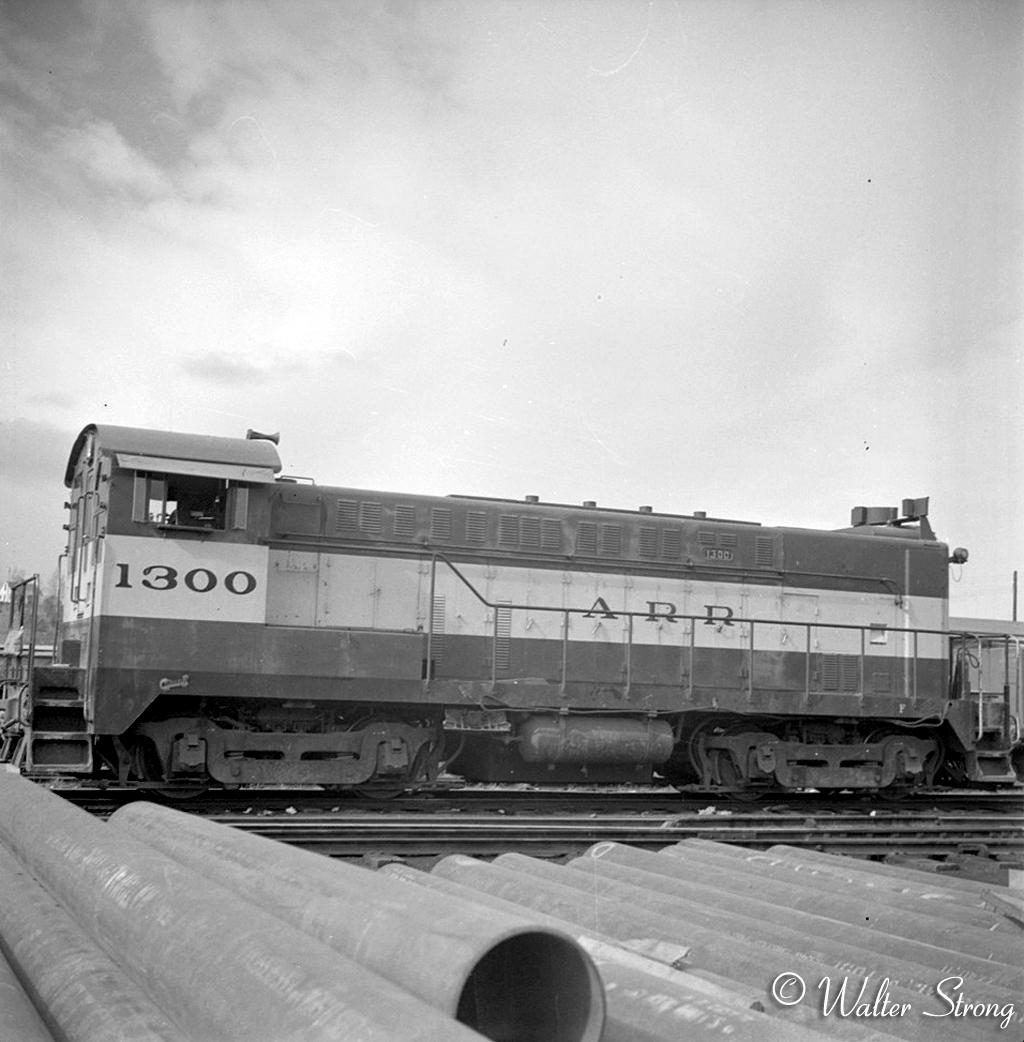
149. Alaska Railroad Number 1300 was the single Baldwin VO1000 on the roster. Used in the Anchorage Yard, she could never get far from the shops. The yard crews preferred her quick acceleration and loading with big traction motors and low gearing. The problem, all that hot rodding had a tendency to blow head gaskets. |
|
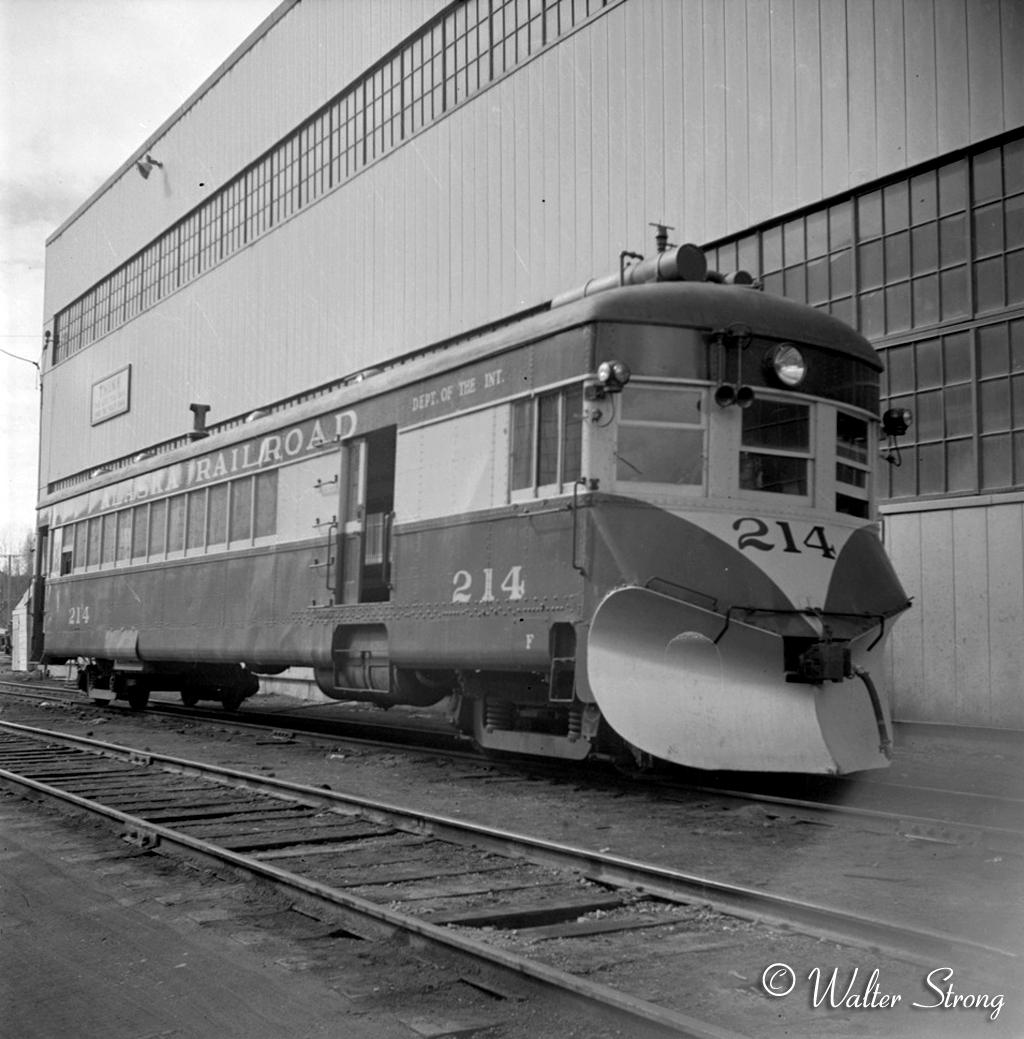
150. In her last incarnation before retirement, ARR Number 214 made regular trips to Palmer with a trailer providing express and passenger service. The blue and yellow paint and skirts were added during a 1948 rebuild and renumber of Number 114. As 114, this doodlebug made regular service trips into Whittier after making the inaugural run through the tunnels in 1943. |
Special thanks goes to the Walter
Strong family for providing these images!
Thanks also to Pat Durand for the extended commentaries.
Page created 3/24/11 and last updated
8/15/16
© 2011 Walter Strong collection unless otherwise noted